Edit Sales Table
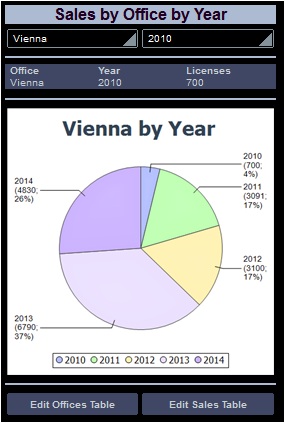
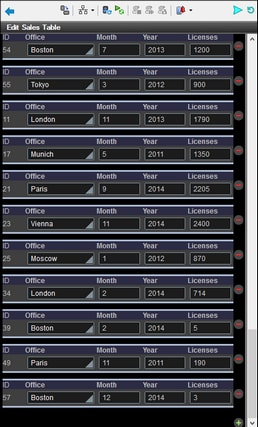
The Edit Sales table, like the Edit Offices Table, has been created on a separate top page. When the solution runs, this page is accessed from the main page (screenshot below left). Clicking the button Edit Sales Table loads the Edit Sales table (screenshot below right). The Sales table has multiple rows, each of which has a non-editable (sales item) ID column, editable Office, Month, Year, and Licenses columns, and a Delete control (see screenshot below right). Additionally, there is an Append Row control below the last row, a Submit button in the Edit Sales Table bar, and a Back button to go back to the previous page (the main page in this case).
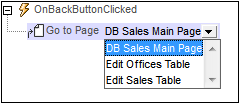
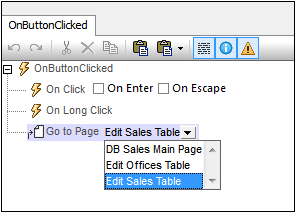
In the design, the Edit buttons (first screenshot below) have both been assigned the Go to Page action on their respective OnButtonClicked events (right-click the button and select Control Actions for OnButtonClicked). These Go to Page actions (second screenshot below) load the respective target pages.

Creating the editable Sales table
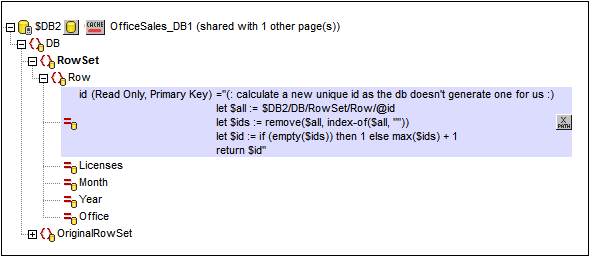
The Sales table in the DB has the structure displayed in the data tree of $DB2 (screenshot below). Since the @id attribute is the primary key, it cannot be changed. This means that when a new record is appended, the end user cannot enter an @id value via the solution. The @id value must be generated automatically using an XQuery expression. The XQuery expression is inserted by using the context menu command, Ensure Exists before Page Load (XPath Value):
let $all := $DB2/DB/RowSet/Row/@id
let $ids := remove($all, index-of($all, ""))
let $id := if (empty($ids)) then 1 else max($ids) + 1
return $id
In the design, we will do the following:
To... | Do this... |
Display all (Sales) rows | Add a repeating table, with the Sales row as the repeating element |
Include controls for deletion and addition of rows | When adding the table, enable the automatic inclusion of Delete/Append controls |
Enable editing of editable values | Add a combo box and edit field controls that have page source links |
Save changes back to DB | Add a Save action to the page's OnSubmitButtonClicked event; Also, right-click $DB2 and toggle on Create OriginalRowSet |
Go back to the main page | Add a Go to Page action to the page's OnBackButtonClicked event |
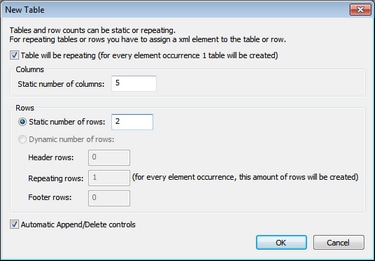
On dragging the table control from the Controls Pane and dropping it in the design, the New table dialog appears (screenshot below). Specify that the table will be repeating, enter the number of columns (5) and rows (2), select the Automatic Append/Delete Controls check box, and click OK. Labels are added for headers to the cells of the first row. A label is added for the uneditable @id value to the first cell of the second row. A source node link to the @id node of $DB2 is created on this label (DB:id). 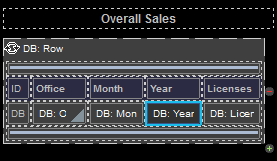
|
A combo box is added for the office (with a source node link to @Office), and edit fields are added for the month, year, and licenses cells, with page source links to the respective nodes. 
|
Click Page | Page Actions to open the Page Actions dialog (screenshot below). 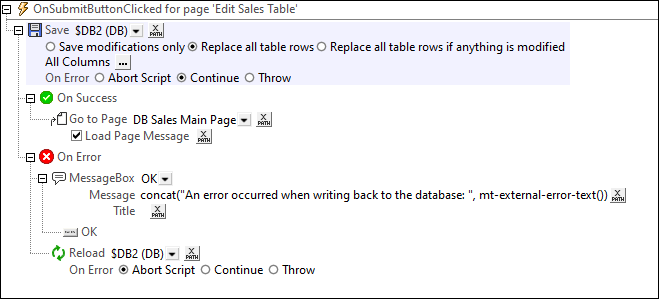 Actions are defined for the following events:
•OnSubmitButtonClicked: Saves all columns of the page to the DB ($DB1) and goes back to the main page. You might also want to add the Reload action so that the DB is reloaded with the unmodified data in case the record is not saved to the DB (see screenshot above). •OnBackButtonClicked: Goes back to the main page.
The tree of the page source must also include an OriginalRowSet element, which is a copy of the RowSet element. Original data is saved in the OriginalRowSet element, so that the columns of the RowSet element can be edited. The OriginalRowSet element is updated with the new value only when the data is saved back to the DB. |
