Example: Mapping CSV Files to XML
The goal of this example is to create a mapping which reads data from a simple CSV file and writes it to an XML file. The files used in the example are available in the <Documents>\Altova\MapForce2024\MapForceExamples\Tutorial\ folder.
1.Select one of the following as transformation language: Java, C#, C++, or BUILT-IN.
2.Add a Text file component to the mapping area (on the Insert menu, click Text File, or click the Insert Text file toolbar button (  ).
).

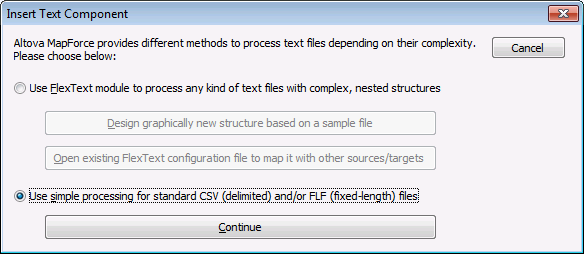
3.Select the Use simple processing ... option, and then click Continue.
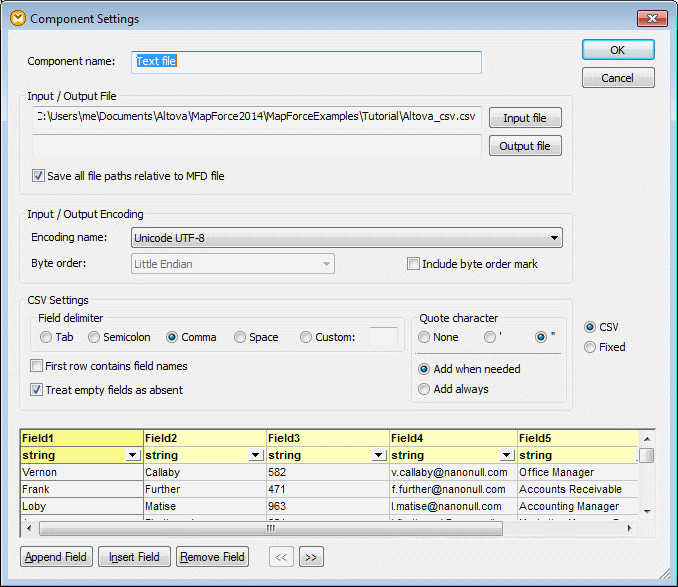
4.On the Component Settings dialog box, click Input file and browse for the Altova_csv.csv file. The file contents are now visible in the lower part of the dialog box. Note that only the first 20 rows of the text file are displayed when in preview mode.

5.Click inside the Field1 header and change the text to First-name. Do the same for all the other fields, as follows: Field 2 => Last-name, Field 3 =>Tel-extension, Field 4 => Email, Field 5 => Position. TIP: Press the Tab key to cycle through all the fields: header1, header2 etc.

6.Click OK.
7.When prompted to change the component name, click "Change component name". The CSV component is now visible in the mapping.
8.Add MFCompany.xsd as the target XML component of the mapping (on the Insert menu, click XML/Schema file).
9.Click Skip when prompted to supply a sample XML file, and select Company as the root element.
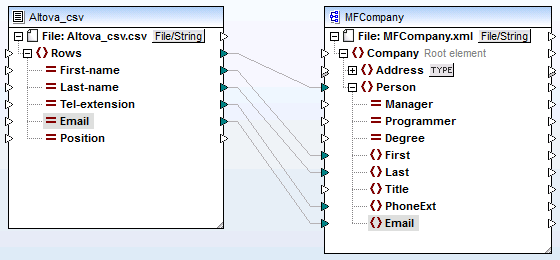
10.Map the corresponding items of both components, making sure to map the Rows item to the Person item in the schema target.
The connector from the Rows item in the CSV component to the Person item in the schema is essential, as it defines which elements will be iterated through. That is, for each row in the CSV file, a new Person element will be created in the XML output file. |

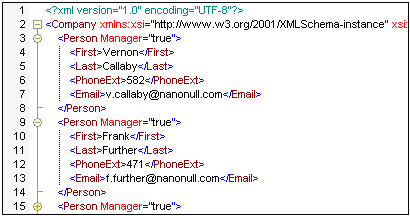
11.Click the Output pane to see the result.
 |
The data from the CSV file is now successfully mapped to an XML file.