Example: Serialize to String (XML to Database)
This example walks you through the steps required to create a mapping design which serializes data to a string. The example is accompanied by a sample file. If you want to look at the sample file before starting this example, you can open it from the following path: <Documents>\Altova\MapForce2024\MapForceExamples\Tutorial\SerializeToString.mfd.
Let's assume you have an XML file (and its related schema) which consists of multiple <Person> elements. Each <Person> element describes a person's first name, last name, job title, phone extension, and email address, as follows:
<Person> </Person> |
Your goal is to extract each <Person> element from the XML file and insert it literally (including XML tags) as a new database record in the PEOPLE table of a SQLite database. The PEOPLE table contains only two columns: ID and PERSON. Its full definition is as follows:
CREATE TABLE PEOPLE (ID INTEGER PRIMARY KEY AUTOINCREMENT NOT NULL, PERSON TEXT); |
After the mapping is executed, the expected result is that the PEOPLE table will have the same number of rows as the number of <Person> elements in the XML file.
To achieve the goal, do the following:
1.Add to the mapping area the source XML component (use the Insert | XML Schema/File menu command). The sample file is available at: <Documents>\Altova\MapForce2024\MapForceExamples\Tutorial\MFCompany.xml.
2.Duplicate (copy-paste) the XML component.
3.On the duplicated XML component, click  , and then select Serialize XML to Strings.

4.Right-click the duplicated component and select Change Root Element from the context menu. Then change the root element to <Person>.
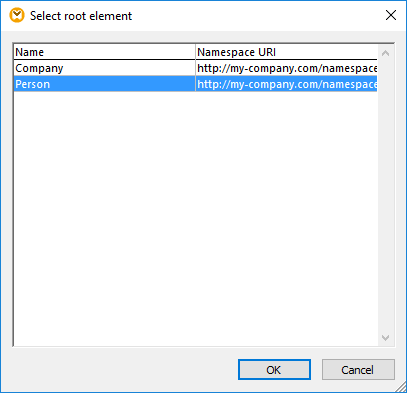
In general, you can change the root element to any element that has a global (not local) declaration in the XML schema. Any elements that are not defined globally in your schema are not listed in the "Select Root Element" dialog box. |
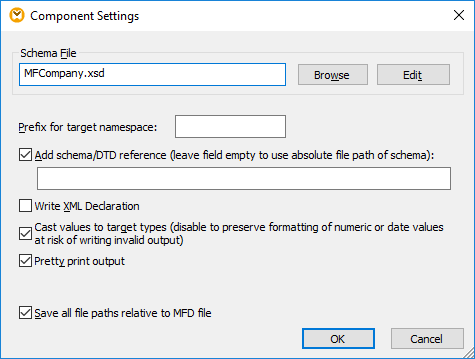
5.Double-click the component and clear the Write XML Declaration check box. This prevents the XML declaration from being written for each <Person> element.
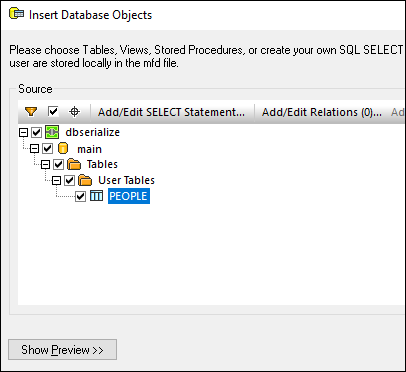
6.Add to the mapping area the target SQLite database component, from the following path: <Documents>\Altova\MapForce2024\MapForceExamples\Tutorial\\dbserialize.db. (To add the database component, use the Insert | Database menu command, see also Connecting to a Database ). When prompted to insert a database object, select the PEOPLE table.
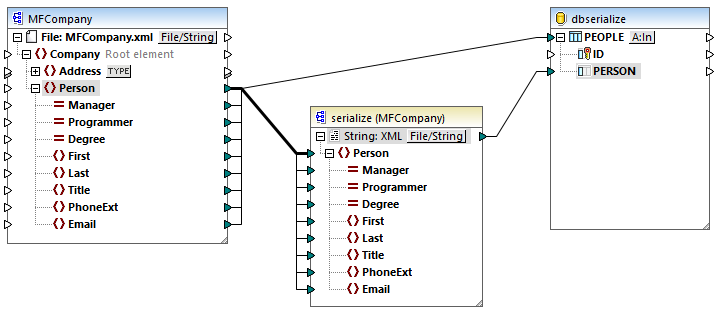
7.Link the components as shown below. On the left side of the mapping, the <Person> element maps to the serialization component. On the right side of the mapping, the serialized string value is inserted into the PERSON column of the PEOPLE database table. Finally, the connector drawn from <Person> to the PEOPLE table instructs MapForce to create a new record for each <Person> element encountered.
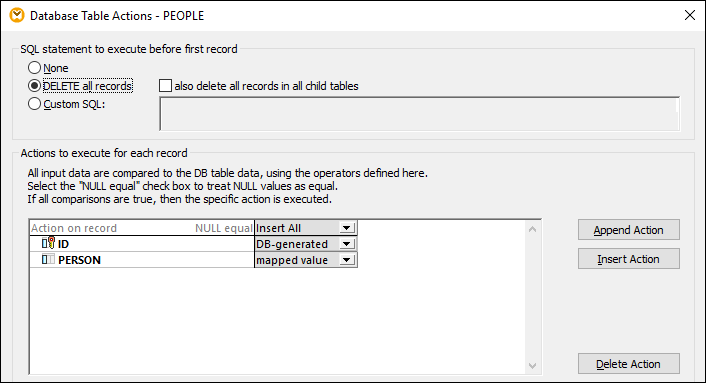
8.Click the A:In button on the database component, and do the following:
a.Select the Delete all records option. At mapping runtime, this will delete any existing records from the database before new ones are inserted.
b.Select the DB-generated option next to the ID column. This ensures that the ID of the record will be generated by the database. Note that the DB-generated option appears only if the column supports this option. For columns that are not an identity or auto-incremented field, the max+1 option is available instead—this option will check what is the maximum value already existing in that column, and insert the next available integer, incremented by 1.
You have now created a mapping design which serializes data to string. If you click the Output pane, the preview SQL query indicates that separate records will be inserted into the database for each <Person> element in the XML file, which was the goal of this mapping.