Creating a Connection String in Visual Studio
In order to connect to a data source using ADO.NET, a valid database connection string is required. The following instructions show you how to create a connection string from Visual Studio.
To create a connection string in Visual Studio:
1.On the Tools menu, click Connect to Database.
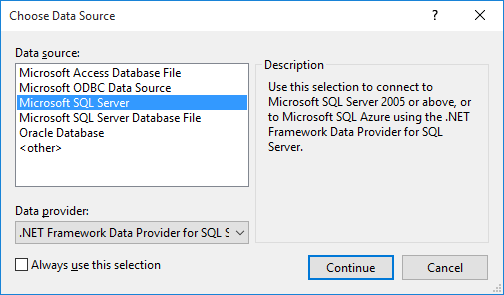
2.Select a data source from the list (in this example, Microsoft SQL Server). The Data Provider is filled automatically based on your choice.

3.Click Continue.

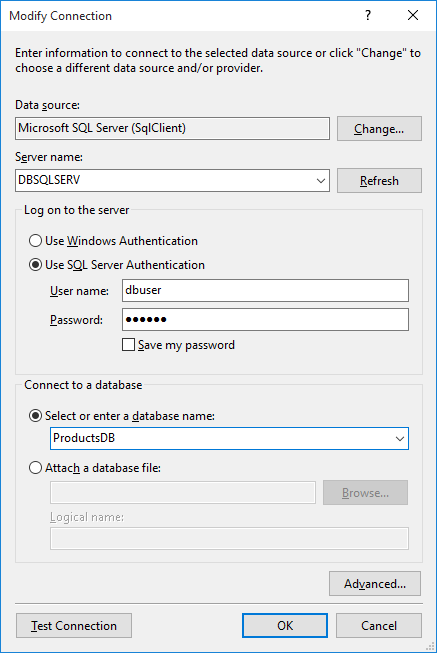
4.Enter the server host name and the user name and password to the database. In this example, we are connecting to the database ProductsDB on server DBSQLSERV, using SQL Server authentication.
5.Click OK.
If the database connection is successful, it appears in the Server Explorer window. You can display the Server Explorer window using the menu command View | Server Explorer. To obtain the database connection string, right-click the connection in the Server Explorer window, and select Properties. The connection string is now displayed in the Properties window of Visual Studio. Note that, before pasting the string into the "Connection String" box of MapForce, you will need to replace the asterisk ( * ) characters with the actual password.