Using Stored Procedures to Generate Keys
This example shows you how to insert some key (ID) generated by a stored procedure into another table, with the help of local relations.
Let us first create the demo stored procedure in the "AdventureWorks" database. To do this, run the script below against the database. You can do this from a query window of Microsoft SQL Server Management Studio, or directly from the DB Query pane of MapForce, see Browsing and Querying Databases. In either case, make sure that your database user account has permission to create stored procedures.
CREATE PROCEDURE Production.uspAddProductModelEx ,@Inst xml ,@ProductModelID int OUTPUT BEGIN |
The stored procedure above takes two parameters (@ModelName, @Inst) as input and performs an INSERT operation into the ProductModel table. It then returns the generated @ProductModelID as output parameter. The requirement is to insert the @ProductModelID returned by the stored procedure into the ProductModelIllustration table.
The following steps show you how to create a mapping that satisfies the requirement above.
1.Connect to the "AdventureWorks" database from MapForce, as described in Adding Stored Procedures to the Mapping. Make sure that your database user account has permission to view and execute stored procedures.
2.When prompted to choose database objects, select the ProductModelIllustration table and the uspAddProductModelEx stored procedure.
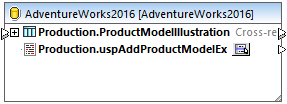
3.Click the Show Context Menu  button next to the stored procedure and select Show Nodes As Target. The stored procedure now appears as target component on the mapping, where the left side lists the input parameters.
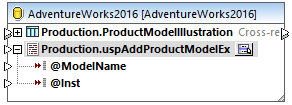
4.Optionally, if you want to execute the stored procedure inside a transaction, click the Show Context Menu  button again, select Procedure Settings, and then select the Use Transactions check box. Defining the transaction for the stored procedure ensures that retrieving the key and inserting the record occur during the same transaction.
5.Right-click the title bar of the database component and select Add/Remove/Edit Database Objects from the context menu.
6.Click Add/Edit Relations, and then click Add Relation. Define the relationships as shown below.
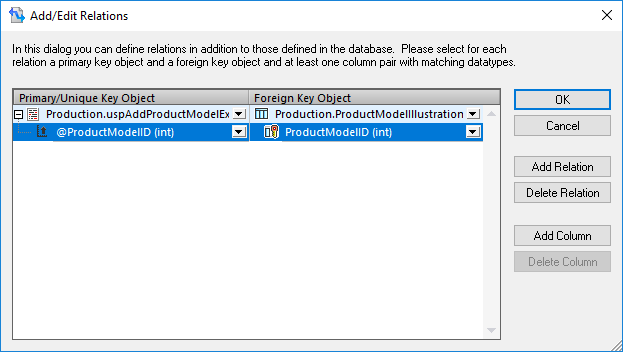
7.Click OK to close the dialog box. Notice that the ProductModelIllustration table now appears as a child of the stored procedure. The stored procedure output parameter (@ProductModelID) is displayed as an indicator that it will be used in the local relation, but it does not have any input or output connectors.
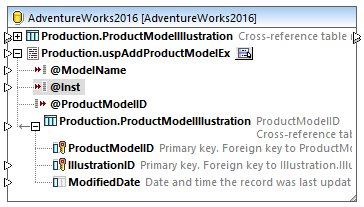
8.In this example, the @Inst parameter is of XML type. Right-click the @Inst parameter on the component and select Assign XML Schema to Field from the context menu. Next, select the Production.ManuInstructionsSchemaCollection schema from the database. When prompted to select a root element, leave the default value as is, and click OK. For more information about mapping data to database XML fields, see Mapping XML Data to / from Database Fields.

9.Add the source components that provides data to be inserted into the database. In this example, the source data is supplied by constants; however, any other source component supported by MapForce could act as input. For more information about constants, see Add a Constant to the Mapping.
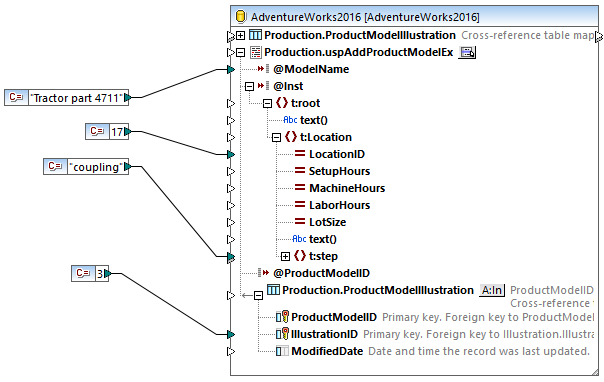
Since this mapping updates a database, you do not preview its output directly like with other mappings. Instead, click the Output button to display the pseudo-SQL containing hints about how the database will be modified. If you enabled transactions, these will occur as indicated by the comments.
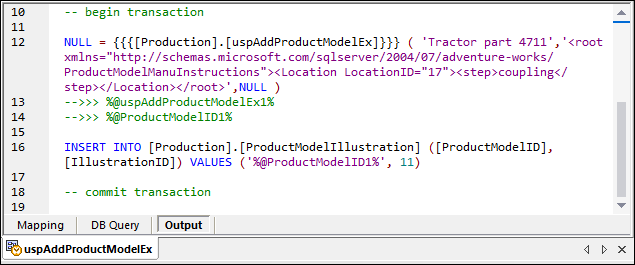
The pseudo-SQL displayed in the Output pane does not show the actual transaction commands, only hints (as comments). The actual SQL commands are sent to the underlying database API, however. |
To run the mapping against the database, do one of the following:
•On the Output menu, click Run SQL-Script.
•Click the Run SQL-Script ![]() toolbar button.
toolbar button.