Stored Procedures as Data Source
This example shows you how to call a procedure that takes no input parameters and just retrieves some data from the database. In this scenario, the stored procedure acts as a source component to the mapping, and you can map data retrieved by it to any other target component supported by MapForce. If you need to call a stored procedure with input parameters, see Stored Procedures with Input and Output.
Let us first create the demo stored procedure in the "AdventureWorks" database. To do this, run the script below against the database. You can do this from a query window of Microsoft SQL Server Management Studio, or directly from the DB Query pane of MapForce, see Browsing and Querying Databases. In either case, make sure that your database user account has permission to create stored procedures.
CREATE PROCEDURE HumanResources.uspGetAllEmployees |
The stored procedure above returns employee information from the vEmployeeDepartment view. The following steps show you how to create a mapping that consumes data returned by this procedure.
1.Connect to the "AdventureWorks" database from MapForce and add the stored procedure to the mapping, as described in Adding Stored Procedures to the Mapping. Make sure that your database user account has permission to view and execute stored procedures.
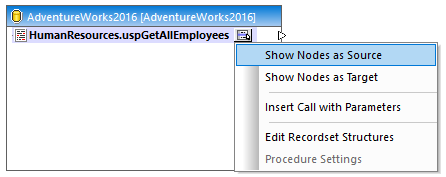
2.Click the Show Context Menu  button next to the stored procedure and select Show Nodes as Source.

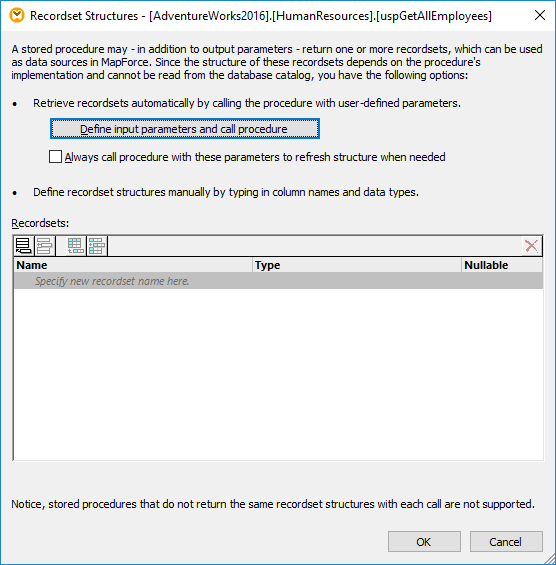
3.Click the Show Context Menu  button again and select Edit Recordset Structures. The "Recordset Structures" dialog box appears.

Calling a stored procedure at design time may have side effects (depending on the procedure implementation). If you do not want to execute the stored procedure at design time, do not click Execute, as further described in subsequent steps. Instead, define the expected recordset in the "Recordset Structures" dialog box, by adding recordsets and their associated columns manually. Use the Add recordset or Add column buttons in the "Recordset Structures" dialog box. |
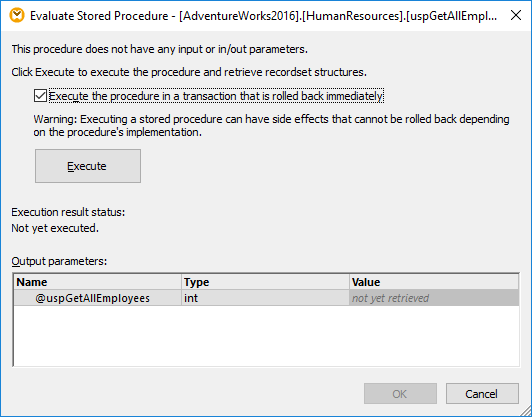
4.Click Define input parameters and call procedure. The "Evaluate Stored Procedure" dialog box appears.

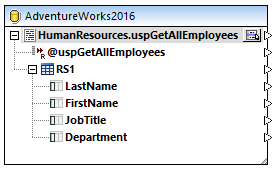
5.Click Execute, and then click OK. The recordset structure ("RS1") is now visible both on the "Recordset Structures" dialog box and on the mapping.

6.At this stage, you can add a target component where the retrieved data will be written. In this example, data will be written to a CSV file. On the Insert menu, click Text File, and add a CSV component to the mapping. For more information, see CSV and Text Files.

You can now preview the mapping. Click the Output button and observe the mapping result in the Output pane, for example:
