Table Components
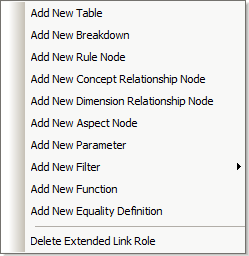
New table components are created via the context menu of a link role node (screenshot below); or, with the view set to Hide Extended Link Roles, via the toolbar icon, ![]() Add New Table Component.
Add New Table Component.

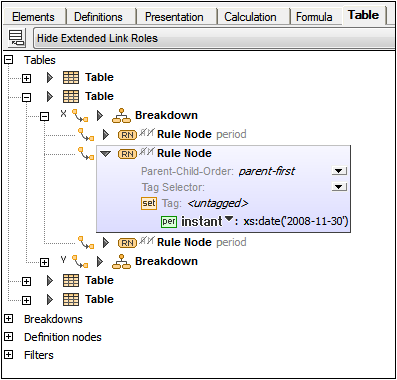
The mechanisms involved in the addition of the various components are described in the sub-sections of this section. After a table component has been added, it is displayed in the diagram in the Table tab (see screenshot below).

For reasons of clarity, table components are divided into sections with relationships to other components (the arcs) being displayed within a tree structure (see screenshot above). The properties of components and of relationships (arcs) are shown in the diagram as icons to the left of the component or arc respectively (see screenshot above).
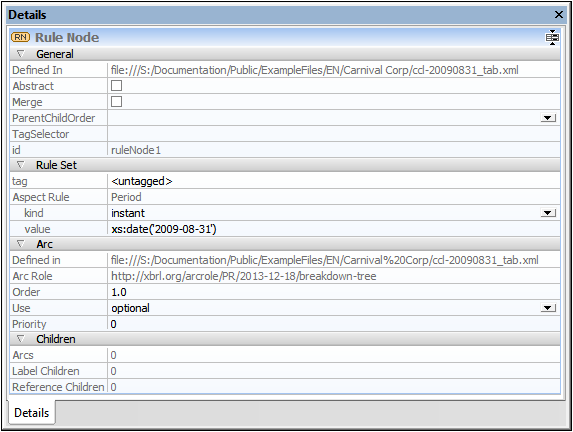
The Details entry helper of the Rule Node highlighted in the screenshot above is shown below. The node's properties are listed under the General section. The values of boolean properties are indicated by a check for true and no check for false. Additional sections list other details related of the node.

To see the properties of an arc in the Details entry helper select the to (destination) component in the diagram; the arc's properties will be listed in the Arc section.
Context menus in the Table Editor
The context menus of table components vary according to the type of component. The menu items are organized into sections, as follows:
•Relation modification (for sub-items only): Override/Remove Arc
•Content modification (rule node, relationship nodes): for example, Append/Insert Aspect Rule
•Add Labels/References
•Creation of new child components (including relationships): for example, Add New Breakdown
•Deletion of component (including of relationships)
•Find Next/Previous Occurrence (of component)
Note: Content items that can be created or removed via the context menu are displayed in the Details entry helper in additional sections, such as Rule Set.