Example: Writing XML Data to a SQLite Field
This example walks you through the steps required to create a MapForce mapping which reads data from multiple XML files and writes it to a SQLite database. The goal of the mapping is to create, for each source XML file, a new database record in the SQLite database. Each record will store the XML document as a TEXT field.
All the files used in this example are available at the following path: <Documents>\Altova\MapForce2025\MapForceExamples\Tutorial\. The file names are as follows:
The mapping design file | •XmlToSqliteField.mfd |
The source XML files | •bookentry1.xml •bookentry2.xml •bookentry3.xml |
The XML schema used for validation | •books.xsd |
The target SQLite database | •Library.sqlite |
To achieve the goal of the mapping, the following steps will be taken:
1.Add the XML component and configure it to read from multiple files.
2.Add the SQLite database component and assign an XML schema to the target TEXT field.
3.Create the mapping connections and configure the database INSERT action.
Step 1: Add the XML component
1.On the Insert menu, click XML Schema/File and browse for the books.xsd schema located in the <Documents>\Altova\MapForce2025\MapForceExamples\Tutorial\ directory. When prompted to supply a sample XML file, click Skip. When prompted to select a root element, select Books.
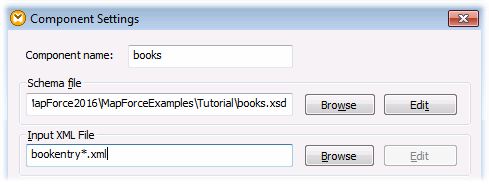
2.Double-click the component header and type bookentry*.xml in the Input XML File box. This instructs MapForce to read all XML files whose name begins with "bookentry-" in the source directory. For more information about this technique, see Processing Multiple Input or Output Files Dynamically.
Step 2: Add the SQLite component
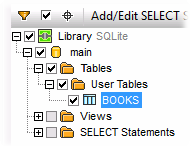
On the Insert menu, click Database, and follow the wizard to connect to the Library.sqlite database file from the <Documents>\Altova\MapForce2025\MapForceExamples\Tutorial\ directory (see also Connecting to an Existing SQLite Database ). When prompted to select the database objects, select the BOOKS table.
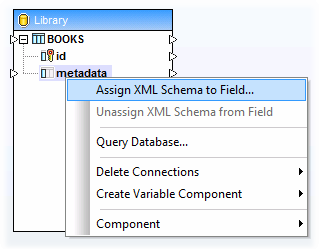
The database field where XML content will be written is called metadata. To assign an XML schema to this field, right-click it and select Assign XML Schema to Field from the context menu.
In this tutorial, the schema assigned to the metadata field is the same one used to validate the source XML files. Click Browse and select the books.xsd schema from the <Documents>\Altova\MapForce2025\MapForceExamples\Tutorial\ directory:

The books.xsd schema has two elements with global declaration: book and books. In this example, we will set book as the root element of the XML written to the database field. Click Choose, and select book as root element:

Step 3: Create the mapping connections and configure the database INSERT action
Create the mapping connections as follows:
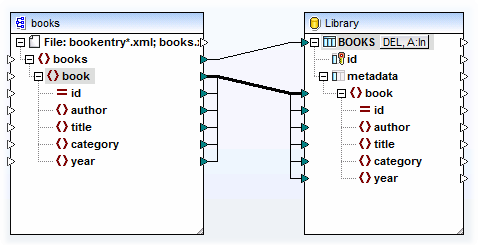
As shown above, the connection from book to book is a "Copy-All" connection, since both the source and target use the same schema and the names of child elements are the same. For more information about such connections, see Copy-all connections.
The topmost connection (books to BOOKS) iterates through each book element in the source and writes a new record in the BOOKS table. Click the A:In button on the database component and set the database update settings as shown below:
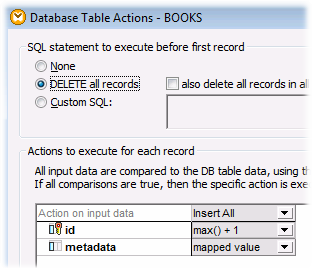
The DELETE all records option instructs MapForce to delete the contents of the BOOKS table before inserting any records.
The Insert All actions specify that a database INSERT query will take place. The field id is generated from the database itself, while the field metadata will be populated with the value provided by the mapping.
Make sure to save the mapping before running it.
To run the mapping and view the generated output, click the Output pane. Note that this action does not update the database immediately. When you are ready to run the generated database script, select the menu command Output | Run SQL Script (or click the  toolbar button).