Step 3: Define Multiple Conditions per Container
FlexText allows you to define multiple conditions per text fragment, using the Switch container. An associated container is automatically allocated to each condition that you define.
The current state of the tutorial at this point is that lower text fragment, of the first Split once container, has been defined:
•A "Split once" container splits off the first line into an Ignore container.
•The remaining segment is defined/stored as a CSV file.
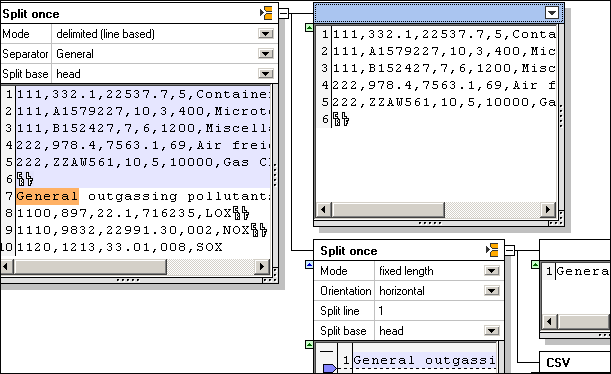
1.Click the top container icon and change it to Repeated split.
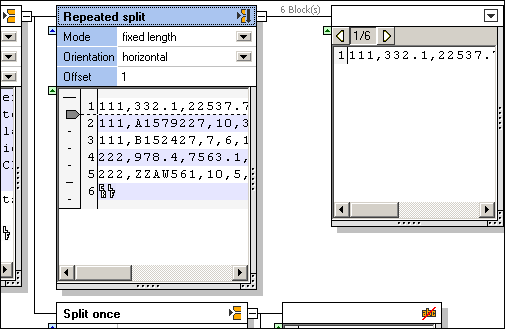
The default settings are what we need at this point. The text fragment is split into multiple text blocks of a single line each. The associated container shows a preview of each of the text blocks.
Clicking the Next text block icon ![]() , allows you to cycle through all the text fragments, of which there are 6.
, allows you to cycle through all the text fragments, of which there are 6.
2.Click the new container and change it to Switch.
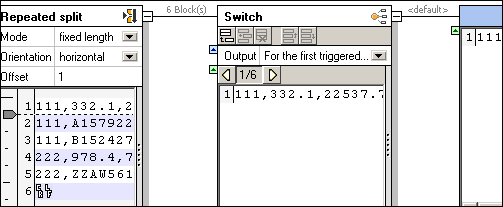
The initial state of the Switch container is shown above.
•An associated container "default", has been added.
•The content of the first record 1/6, is displayed in the default container.
3.Click the Append condition icon ![]() in the "Switch" title bar, to add a new condition.
in the "Switch" title bar, to add a new condition.
4.Double click in the field "Content starts with", and enter 111.
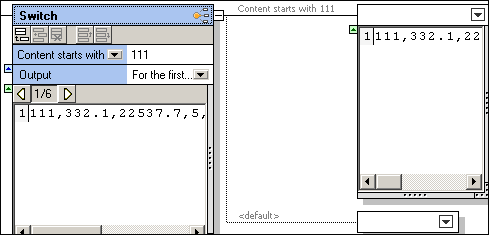
This defines the first condition. An associated container (Content starts with 111) has been added above the "default" container.
5.Click the append icon again, and enter "222" in the Content starts with field.
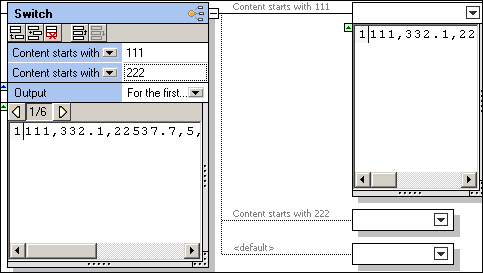
A third container has been added (Content starts with 222).
Note: Clicking the "Contents starts with" combo box, allows you to select the "Contains" option. This allows you to specify a "string" which can occur anywhere in the text fragment.
6.Click the Next text block icon  , several times to see the effect.
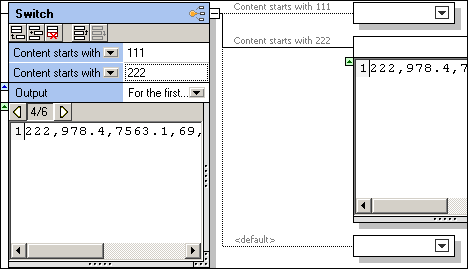
Upon reaching record 4 of 6, container 222 opens up, and displays its content.
7.Continue clicking, till you reach record 6 of 6. A single CR / LF character is displayed in the default container.

If a data fragment in the current block satisfies a condition, then the complete data of that block is passed on to the associated container. Data is not split up in any way, it is just routed to the associated container, or to the default container if it does not satisfy any of the defined conditions.
8.Click the first two containers and change them to Store as value. Click the last container and change it to Ignore.
9.Double-click the "Store" text, and add descriptive text e.g Key 111 and Key 222.
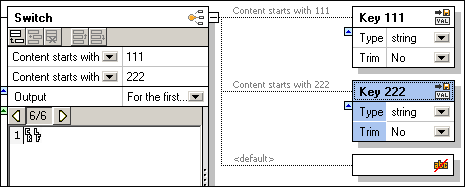
10.Save the FlexText template, e.g. Flex-Tutorial.mft.