Compare CSV Files
CSV file comparisons are very similar to database data comparisons. CSV files are treated just as any other data source, and you can connect to them using the same connection wizard used with databases. This example describes how to compare two CSV files; however, you can also add a database on either side of the comparison.
Step 1: Add the "left" and "right" data source
1.On the File menu, click Compare Database Data. Alternatively, click the Data Comparison ![]() toolbar button. Follow the wizard steps and browse for the CSV file. Make sure to select the correct separator (comma, semicolon, or tab) and to indicate whether the first row of the CSV file is a header row. For more information, see Adding CSV Files as Data Source.
toolbar button. Follow the wizard steps and browse for the CSV file. Make sure to select the correct separator (comma, semicolon, or tab) and to indicate whether the first row of the CSV file is a header row. For more information, see Adding CSV Files as Data Source.
2.When prompted to give a name to the data source, type a descriptive name to easily identify this CSV file, and click OK.
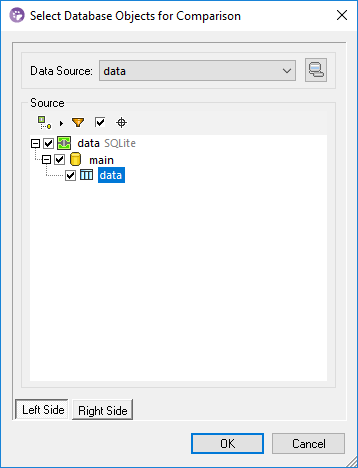
3.Select the check box next to the CSV table ("data", in this example), and then click either Left Side or Right Side to designate this CSV as the left or the right side of the comparison.

4.So far, you have added only the first data source. To add the second one, click the Browse ![]() button of the empty component, and choose the second data source from the Data Source list, if one is available. Otherwise, click Quick Connect
button of the empty component, and choose the second data source from the Data Source list, if one is available. Otherwise, click Quick Connect ![]() and follow the wizard steps to connect to the second data source.
and follow the wizard steps to connect to the second data source.
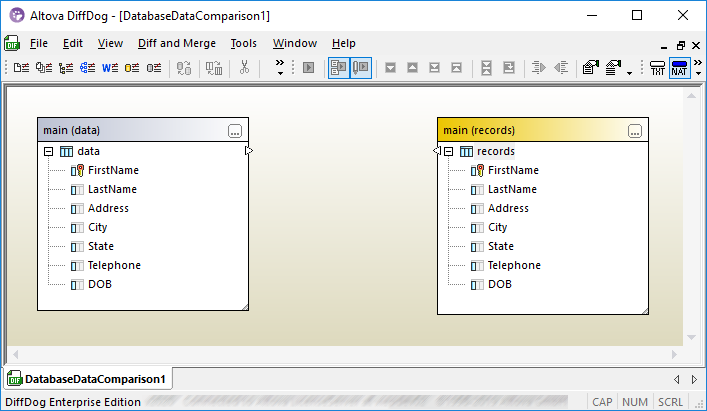
At this stage, you should have at least one object displayed on each side of the comparison, for example:

In CSV files, the column names shown in the components above are the ones that appear on the first row of the CSV file. This assumes that you have selected the Treat first row as header option while adding the CSV data source. Otherwise, columns are displayed as c1, c2, c3, and so on, according to their ordinal number, starting with 1.
Step 2: Map column pairs
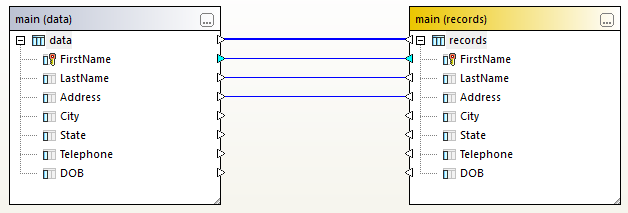
You can now indicate the column pairs that are to be included in the comparison by drawing mapping connections between them, for example:

To create a mapping, click the triangle on the left component and, holding the left mouse button pressed, drag it to a target triangle on the right component. To delete all mappings of a comparison, right-click the title bar of either component and choose Unmap items from the context menu. To delete a single mapping, right-click the appropriate object and choose Unmap selected from the context menu. Alternatively, click the connection line between two mapped objects and press Delete.
Note: Unmapping a table will also unmap all columns of that table.
Step 3: Run the comparison
Now that the mappings are created, you can run the comparison as follows:
•On the Diff and Merge menu, click Start Comparison. (Alternatively, click the Start Comparison  toolbar button, or press F5.)
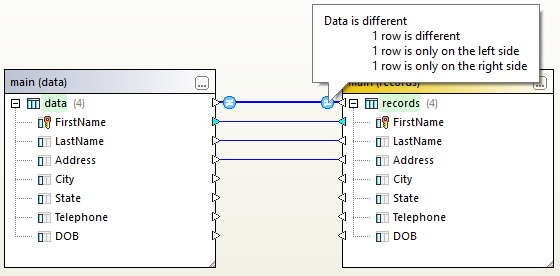
At this stage, the ![]() icon appears on the mapping line if the compared data is not equal. Move the mouse cursor over this icon to view a quick summary, for example:
icon appears on the mapping line if the compared data is not equal. Move the mouse cursor over this icon to view a quick summary, for example:

For information about exploring the comparison results in more detail, see Viewing Differences Between Tables.
Optionally, you can also merge data between two CSV files, or between a CSV file and a database, in either direction, see Merging CSV and Database Differences.