Example: Full AS2 Message Exchange (Simple)
This example illustrates how to configure a complete AS2 message exchange between two AS2 partners, from a FlowForce Server perspective. In this example, both the sending AS2 partner and the receiving AS2 partner are FlowForce Server instances.
Let's call the sending server "Hermes" and the receiving server "Apollo". Let's also note that Hermes runs on CentOS while Apollo runs on Windows (this detail is important only for paths and firewall configuration, as shown below). The goal of this example is as follows:
•The sending server (Hermes) must successfully send an AS2 message to the receiving AS2 server (Apollo).
•The receiving server (Apollo) must successfully process the incoming message and store it locally.
This example illustrates the simplest possible communication scenario between two AS2 partners (the first permutation out of twelve possible permutations according to section 2.4.2 of RFC 4130), which essentially means the following:
•The sender sends unencrypted AS2 data
•The sender sends unsigned AS2 data
•The sender does not require that an MDN be returned in reply to the message
Other assumptions:
•Apollo and Hermes are both running on a local private network.
•The receiving AS2 server (Apollo) will accept HTTP requests from unauthenticated clients (that is, the AS2 service will be accessible publicly).
Prerequisites
•FlowForce Server Advanced Edition must be installed and licensed on both Apollo and Hermes machines.
•On both Apollo and Hermes servers, the FlowForce Web administration interface must be up and running on the configured host and port (for example, http://apollo:8082 and http://hermes:8082, assuming that "apollo" and "hermes" are the respective host names). See also Defining the Network Settings.
Configuring the sending AS2 server ("Hermes")
1.Log on to the FlowForce Web administration interface and create a new AS2 partner called "APOLLO" (see also Configuring AS2 Partners). This partner identifies the server that will receive AS2 messages. Since encryption, signing, and MDN are not required in this simple example, the only partner settings that must be defined are as follows:
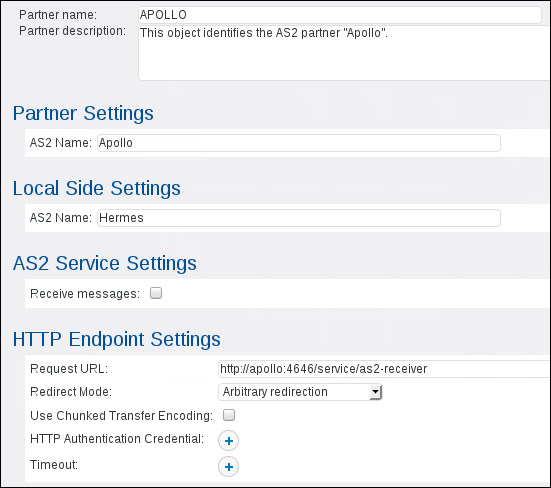
As illustrated above, the AS2 partner's name used for AS2 communication is "Apollo", while the partner object name stored in FlowForce Server is "APOLLO". The "Request URL" value assumes that the partner's host name is also apollo. If the host name is different, adjust the URL accordingly. We will configure the actual AS2 service behind this URL in a subsequent step.
2.Create a new job that sends an AS2 message.
a) Open to the public container, and click Create | Create job.
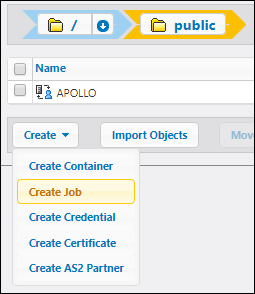
Enter a job name (for example, "send-as2"), and, optionally, a description.
b) Click New filesystem trigger and set the trigger settings as shown below. If the directory /home/altova/as2/outgoing does not exist on Hermes machine, create it.

As soon as you add the trigger, a parameter called triggerfile is added to the job. This parameter represents the file name that will trigger this job automatically, whenever you copy a file to /home/altova/as2/outgoing. For more information, see File System Triggers.
c) Add an execution step that sends an EDI file from the local path defined previously to the AS2 partner. For more information about what this step does, see Sending AS2 Messages.
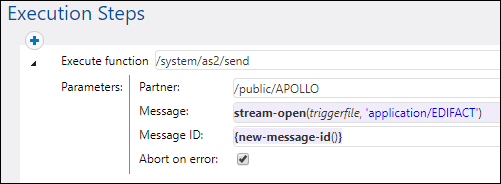
d) Finally, add the credentials of the user account on the local machine (typically, the username and password that you use to log on to this machine). Note that these credentials are not the same as the username and password to the FlowForce Web administration interface. For more information, see Credentials.

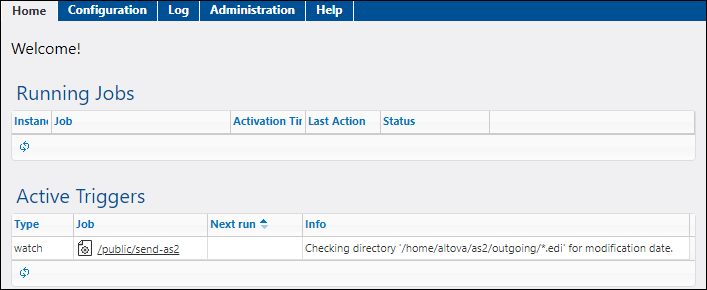
e) Click Save. The job should now appear under "Active Triggers" in the FlowForce Server home page.
Configuring the receiving AS2 server ("Apollo")
1.Configure FlowForce Server to accept connections from AS2 clients on the designated URL. In this example, AS2 clients will connect to Apollo through plain HTTP on default port 4646, so the configuration page should look as follows (see also Defining the Network Settings):

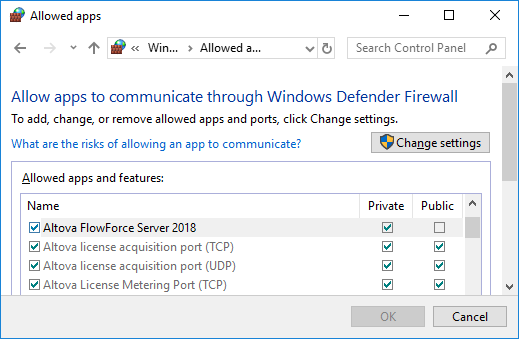
2.Make sure that FlowForce Server is allowed to communicate through the operating system's firewall. In this example, since the "Apollo" FlowForce Server runs on Windows, it must be allowed to communicate through Windows Defender Firewall.
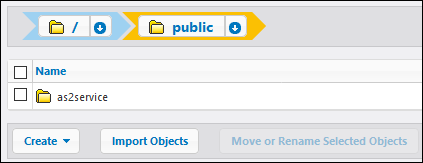
3.Create a new FlowForce Server container; let's call it "as2service". (In FlowForce, permissions are set at container level, so it is advisable that you create a separate container for the job that will receive AS2 messages. This way, you will be able to set AS2-specific permissions only to the required container, without affecting the permissions applicable to other existing FlowForce jobs).
4.Open the "as2service" container defined previously and create the sending partner, Hermes, as shown below. The "Request URL" value assumes that the partner's host name is also hermes. If the host name is different, adjust the URL accordingly.
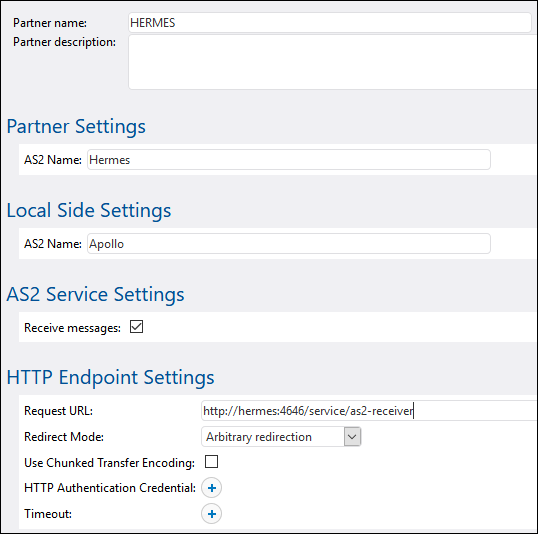
Make sure that the Interoperability Settings are the same on both servers, for example:

5.Open the "as2service" container defined previously and create a new job. The purpose of this job is to expose an AS2 service that listens to AS2 requests. When a new AS2 message is received, this job will copy it to a temporary folder.

a) Select the Make this job available via HTTP at... check box and give a name to the AS2 service (in this example, "as2-receiver").

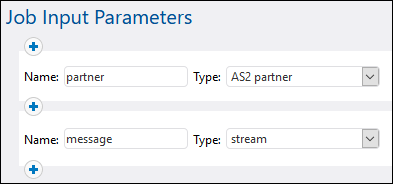
b) As illustrated above, select the option AS2 service from the drop-down list. As a result, two input parameters are added to the job, partner and message. These can be used to process and store information about the sending partner and the message, respectively. In this example, we will store the message only, as shown in a subsequent step.
c) Add an execution step that copies the received message to a local path. The FlowForce Server expressions used below essentially convert the message to a file, and compose the file name based on the Message-ID header field. For a more detailed explanation about these expressions, see Receiving AS2 Messages.
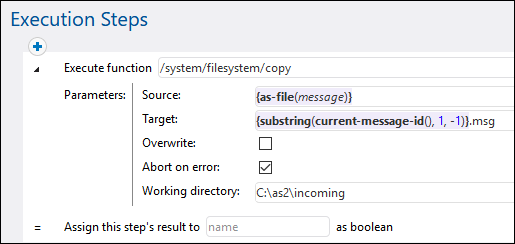
Make sure that the directory C:\as2\incoming exists. This is the directory where received AS2 communications will be saved.
d) Finally, add the credentials of the user account on the local machine (typically, the username and password that you use to log on to this machine). Note that these credentials are not the same as the username and password to the FlowForce Web administration interface. For more information, see Credentials.

6.Go to the container public / as2service, and click Permissions. Click Add Permissions and assign the permission "Service: Use" to user ![]() anonymous on the "as2service" container.
anonymous on the "as2service" container.
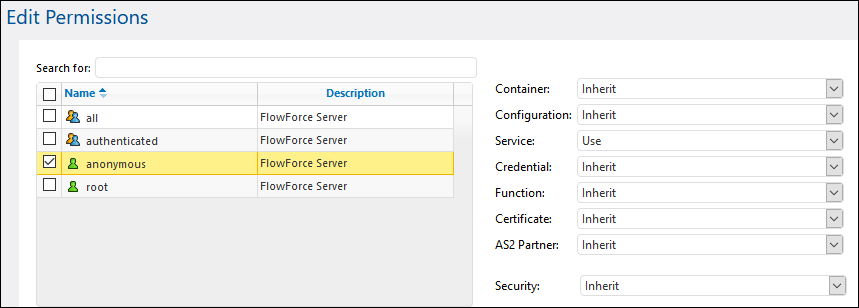
The container permissions now look as follows:
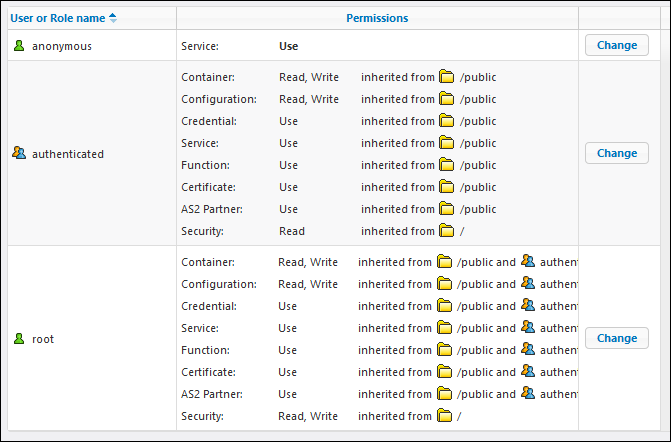
This effectively makes the AS2 service public and enables anyone to access and consume it, without authentication.
Sending the AS2 message
On Hermes machine, copy an .edi file to the directory configured previously, /home/altova/as2/outgoing. When the directory polling interval elapses (60 seconds, by default), the trigger is executed, and the job sends the file to the AS2 service on Apollo machine.
To view the job result, check the FlowForce Server log, see Viewing the Job Log. If the job fails, the reason will be indicated in the log. There could be multiple reasons why a job may fail, including the following:
•The path to the EDI file on Hermes is incorrect
•The Hermes operating system credentials specified in the job are incorrect
•The Apollo service http://apollo:4646/service/as2-receiver is not available because the firewall on Apollo machine blocks it
•The FlowForce Server container permissions for service http://apollo:4646/service/as2-receiver forbid anonymous access (that is, the AS2 service is not accessible to clients)
•The "Request URL" parameter of the Apollo partner is incorrect (on Hermes machine, on Apollo machine, or both)
•The "Interoperability Settings" parameters are misconfigured for Hermes partner on Apollo machine.
On success, the receiving job on Apollo machine processes the incoming message and creates a new file at the following path: C:\as2\incoming.