Adding UModel Support to Eclipse Projects
Before you can work with UModel projects (.ump file) in the Eclipse environment, make sure to create or open an Eclipse project first (this can be, for example, a new or existing Java project to which you would like to add UML support). This topic shows you how to create a new UModel project within an Eclipse project. For instructions on how to import an existing UModel project into an Eclipse project, see Importing Existing UModel Projects.
To add a UModel project to an Eclipse project:
1.Create a new (or open an existing) Eclipse project, by using the standard Eclipse commands (File | New | Project, or File | Open File).
2.On the File menu, click New | Other, and then select the UModel Project File type from the dialog box.

3.Click Next.
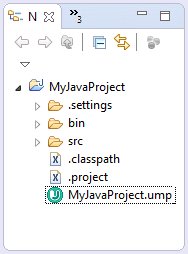
4.When prompted, select a parent folder for the new UModel project, and click Finish. The new UModel project becomes available in the Navigator view, under the parent folder you specified.

UModel projects cannot be opened in an editor. To take actions against the project (such as saving or loading its contents into Eclipse), right-click the .ump file, and select the required command. |