Design Database Tables
So far in this tutorial, you have created an empty SQLite database. With DatabaseSpy, there are various ways to create database objects or modify existing ones. This part of the tutorial shows a simple approach to quickly create a new table. The new table will supposedly store some reports, and it should consist of the following columns:
•The identifier ("id") of the report, of type INTEGER. This column must have a primary key which ensures the value of each row is unique.
•The report name ("name"), of type TEXT.
Step 1: Create a new table
To create the new table:
1.Make sure that the data source is connected  in the Project window. Otherwise, right-click the data source, and select Connect.
2.Click the Show in Online Browser ![]() button that appears next to the connected data source. (Alternatively, click the Online Browser tab.)
button that appears next to the connected data source. (Alternatively, click the Online Browser tab.)
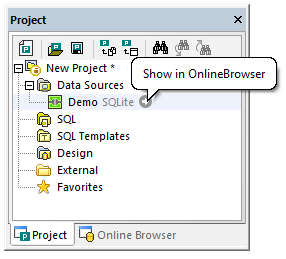
3.In the Online Browser, right-click the main  database, and select Create Table from the context menu. This action has the following outcome:
•A dialog box appears and informs you that DatabaseSpy has created a change script for the current action. Click OK to dismiss the dialog box.
•A new table called "newtable" appears with the "Tables" folder. Notice that the table has the ![]() icon overlaid, which indicates that it is a new uncommitted database object. Likewise, the database has the
icon overlaid, which indicates that it is a new uncommitted database object. Likewise, the database has the  icon overlaid, which indicates that some of its child objects have uncommitted changes.
•No changes are committed to the database at this stage. The database change script generated so far is displayed in the Database Structure Change Script Window.
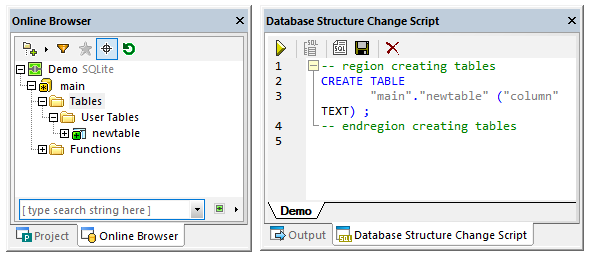
4.Select the table and press F2 to rename it to "reports". You can also right-click the table and select Rename table from the context menu. You will notice that the change script is updated accordingly.
By default, the script will keep changing as you are changing the structure of the database in subsequent steps; therefore, you might want to select the Don't show this message again option.
Step 2: Add columns
Each time when you create a new table from DatabaseSpy, it has one column by default. Recall that, in this example, the requirement was that the first column must be named "id" and it should be of type INTEGER. It must also be a primary key. To achieve this, take the following steps:
1.Select the column and then press F2 to enter the new name ("id").
2.To change the column's type, first select the column and then change the Type property to INTEGER in the Properties Window.
3.Also, make sure to clear the Nullable property. This makes it possible to add the primary key to the column in a subsequent step.
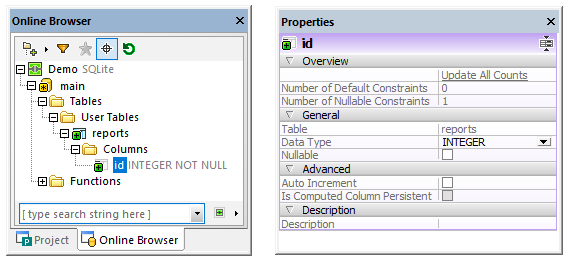
With other database types, you might want to set additional properties of the column, like Size or Auto-increment. The database used in this example is a SQLite database, so it does not need an Auto increment property explicitly, because the first column in the table is of type INTEGER and has a primary key.
4.To add the primary key on the "id" column, right-click the column and select Create Primary Key from the context menu. The outcome is that a "Keys" folder is added to the table, which stores the new primary key.
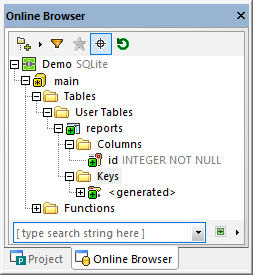
The new primary key has the name <generated> by default; this indicates that the key name will be generated by the database when you commit the script. Note that, with SQLite databases, the name of primary keys is always shown as <generated> in DatabaseSpy, even after the script is committed to the database. Other database kinds may support changing the <generated> name to a custom name and displaying it as such after the script was committed, see also Reference of Generated Names.
Using the same steps as above, add a new column called "name" of type TEXT.
Step 3: Commit the change script
The table design created so far has not been committed to the database yet. To commit the changes to the database, click the Execute the Generated SQL Change Script  button in the Database Structure Change Script window.
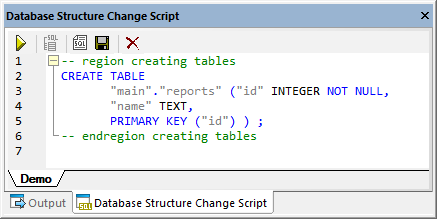
DatabaseSpy runs the script against the database, and informs you about the result. The new table is now visible in the Online Browser.
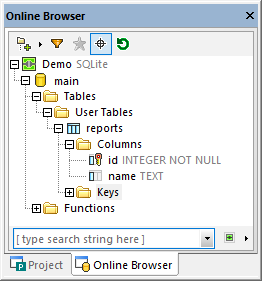
This concludes the design part of this tutorial. For more in-depth information about designing database objects, see Managing Database Objects.