Create a new database
This tutorial part shows you how to create a new SQLite database using DatabaseSpy. The steps are very similar for a Microsoft Access database, since it is also file-based. For databases which are hosted on a server, creating the database requires a different approach, see the "ZooDB" Database tutorial.
To create a new SQLite database:
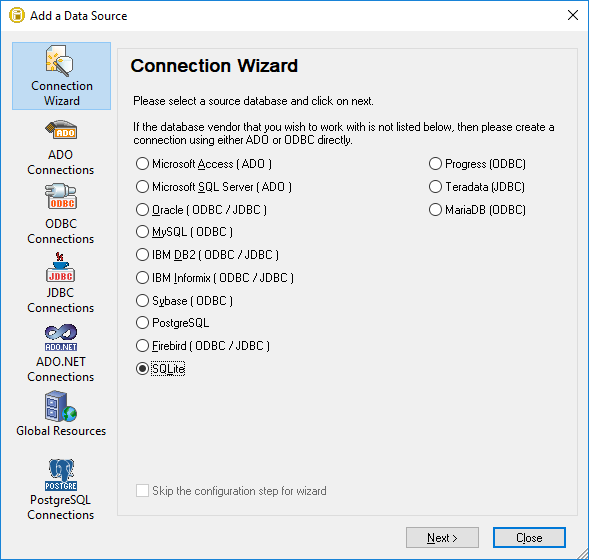
1.Run DatabaseSpy. The Add a Data Source dialog box opens. (You can open this dialog box at any time using the menu command File | Create a Database Connection.)
2.Select SQLite and click Next.

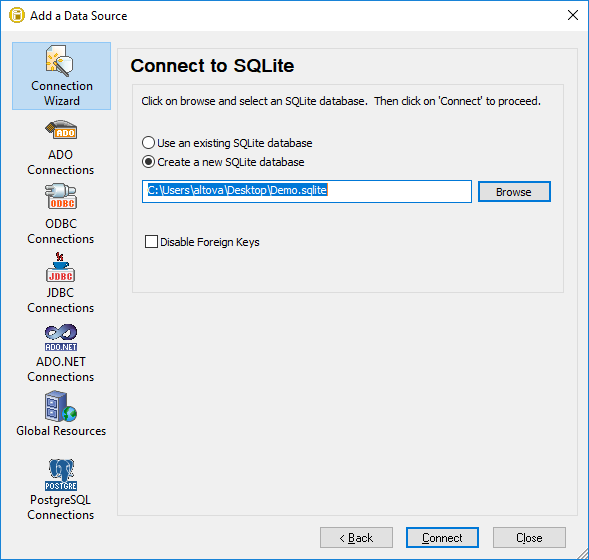
3.Select Create a new SQLite database.
4.Click Browse and select a destination path and name.

Note: There is no restriction as to what the extension of the SQLite database file should be. To recognize it easily, you might want to call the file Demo.sqlite , but you can also use other extensions, such as .db (note this documentation and the accompanying sample files use the .sqlite suffix by convention). For the scope of this tutorial, it is also recommended to enter a dedicated full path instead of just the database file name.
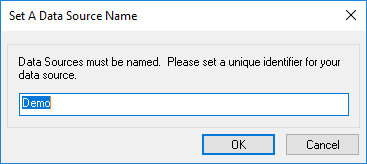
5.Click Connect. You are now prompted to name the data source, for example:

6.Leave the default value as is, and click OK.
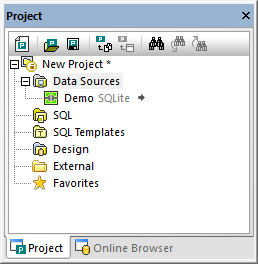
A data source is now available in the Project window in the top left area of the DatabaseSpy graphical interface. Notice that the data source icon is green  , which indicates that the connection to the database is currently active. To quickly connect to the database or disconnect from it, right-click the connection and select Connect (or Disconnect, respectively) from the context menu. When a data source is disconnected, its icon changes to
  .
.

Project window
Also notice that, when a data source is selected in the Project window, its connection details are shown in the Properties window. This applies not only to data sources, but virtually to any object that you select from the user interface, including tables, columns, SQL scripts, and so on.
DatabaseSpy projects
Projects are a convenient way to organize database connections and database-related files such as SQL scripts. Saving data as a DatabaseSpy project will make it easier for you to connect to the same database in future, since you won't have to go through the database connection wizard steps again.
To save the DatabaseSpy project created so far, do one of the following:
•On the File menu, click Save Project As.
•Click the Save Project  button in the Project Window.
You can also conveniently add multiple database connections to the same project. To do this, right-click the "Data Source" folder in the Project Window, and select Add a New Data Source from the context menu.