Entry Forms
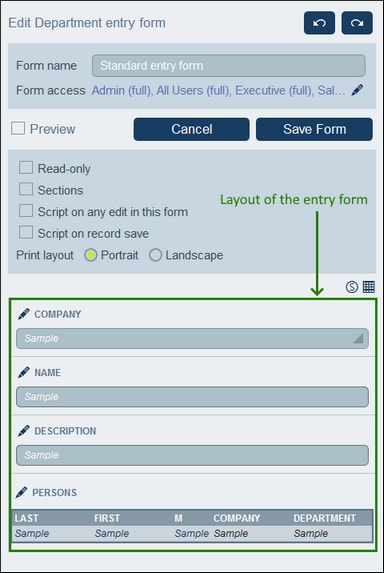
You can design one or more entry forms for a data table (see screenshot below) and specify which users have access to each entry form and under different conditions. An entry form is used to enter the data of a data table's records, one record at a time. When users open a data table for data entry, they can choose one of the forms to which they have access and enter the required data. By creating different forms, each with a different set of users, you can control which users get to enter which items of data or which users may only read data in the different forms.
Design your entry forms using the following broad steps:
1.Decide what fields you want to include in the form, how the fields will be laid out (in a table structure), which users will have access to the form for viewing only and/or data entry. Alternatively, the entire form can be read-only.
2.Decide whether the form should be divided into sections for a better overview, and whether sections should appear one section at a time or all together.
3.Add sections as required. Alternatively, you can also create a form that has no explicitly demarcated section.
4.If you want to modify the fields of the form when a field is edited, select Script on any edit and enter the XPath expression that will modify the fields.
5.You can also select Script on record save to add a script that will modify fields and/or send emails when a record is saved.
6.Modify the structure of the table by adding/deleting rows and columns. Note that you can also add an entire table within a table cell.
7.Within table cells, add content items (such as fields and text) or structural items (such as tables and child-data table rows).
8.Style individual table contents.
9.Create templates from an entry form. Templates are entry forms that are partially filled with data when a new record is created using this template. The user can subsequently modify the data. For each entry form, multiple templates can be created, enabling the user to create a new record using any of these templates.
After a form has been saved, it can be edited at any time by clicking its name on the Edit Forms page. The entry form will be displayed (as in the screenshot above) and can be edited.
After completing your edits (for new forms or existing forms), click Save Form to finish. This will take you back to the Edit Forms page, where you must click Save Changes for all changes to be saved to the database.
