Modeling Databases in UModel
You can model databases in UModel in one of the following ways:
1.Without code engineering support. In this scenario, you model the database objects without connecting to a real database (for example, you just want to create a diagram that illustrates the potential structure of a database).
2.With code engineering support. In this scenario, you connect to a database, import its structure into the model, and then view the database object definitions directly in UModel. Upon reading the database structure, UModel can automatically generate database diagrams. Optionally, you can modify the database objects in the model (for example, add a new table, or delete an existing one) and then update the real database by means of scripts generated by UModel. Synchronization between your database and the UModel project works in both directions, similar to how it works for programming languages. You also have the option to synchronize only the changes (do a merge), or overwrite all existing data (either the database from the model, or the model from the database).
In either of the cases above, your project must contain the Database profile available with UModel. This profile provides all the required metadata (such as UML stereotypes) that enable you to view or design database objects in UModel.
If you are using the code engineering approach, the Database profile and all the required code engineering configuration will be added automatically to your project the first time when you import a database into the model. Otherwise, you will need to include the Database profile manually.
To add the database profile to a UModel project manually:
1.Create a new UModel project or open an existing one, see Creating, Opening, and Saving Projects.
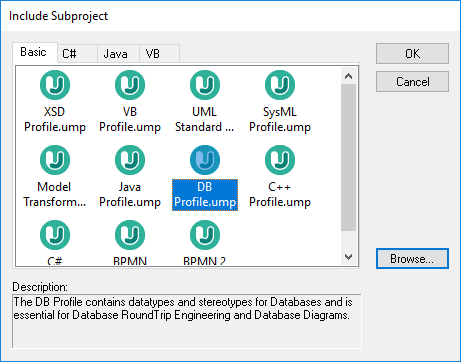
2.On the Project menu, click Include Subproject.

3.On the Basic tab, select DB Profile.ump, and then click OK to confirm.
Alternatively, do the following:
1.In the Diagram Tree Window, right-click Diagrams, and select New diagram | Database Diagram.
2.When prompted, select a package where the new diagram should belong.
3.When prompted by UModel that the Database profile will be added to your project, click OK to confirm.
Now that the UModel DB profile has been added, you can start modeling your database objects. For example, when you right-click inside a database diagram, the context menu provides options to create a new table. Likewise, when you right-click a table, the context menu provides options to create a column, keys, indices, and so on. For further information, see Designing Database Objects.
To establish a connection to a database and use the code engineering approach, see Importing SQL Databases into UModel.