Inserting Activity Diagram elements
To add elements to the diagram:
1.Click the element's toolbar button in the Activity Diagram toolbar.
2.Click in the Activity Diagram to insert the element.
To insert multiple elements of the selected type, hold down the Ctrl key and click in the diagram window.
Dragging existing elements into the activity diagram
Most elements occurring in other activity diagrams can be inserted into an existing activity diagram.
1.Locate the element you want to insert in the Model Tree Window (you can use the search function text box, or press Ctrl+F to search for any element).
2.Drag the element(s) into the activity diagram.
Inserting an action (CallBehavior)
1.Click the Action (CallBehavior)  toolbar button, and click in the Activity diagram to insert it.
2.Enter the name of the Action, e.g. "Validate References", and press Enter to confirm.

| Note: | Use Ctrl+Enter to create a multi-line name. |
Inserting an action (CallOperation) and selecting a specific operation
1.Click the Action (CallOperation) icon  in the icon bar, and click in the Activity diagram to insert it.
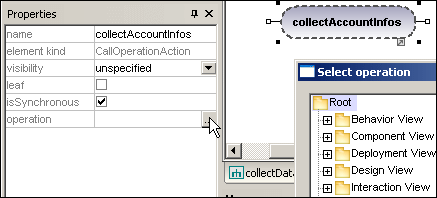
2.Enter the name of the Action, e.g. "collectAccountInfo", and press Enter to confirm.
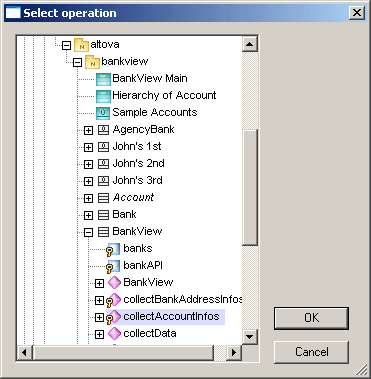
3.Click the Browse button to the right of the operation field in the Properties tab. This opens the "Select Operation" dialog box in which you can select the specific operation.

4.Navigate to the specific operation that you want to insert, and click OK to confirm.

In this example, the operation "collectAccountInfos" is in the BankView class.
