Part 2 – Analyzing a Legacy Application with Altova UModel
In Part 1 of the Analyzing a Legacy Application series we introduced our ATM simulation app, imported the Java source code into a UModel project, and refined a class diagram to see an overview of the application classes and their relationships. In this entry we will create use case diagrams to document the current functionality of our ATM app and we’ll add to one use case diagram to plan a future enhancement. As we saw in Part 1, when a user runs our ATM simulation, he is asked to log in with an account number and PIN, then is presented with a transaction menu that summarizes all available interactions with the application:  With the Transaction menu as a guide, we can create an overview use case diagram that documents user interactions with the ATM simulation:
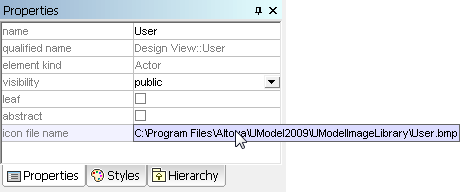
 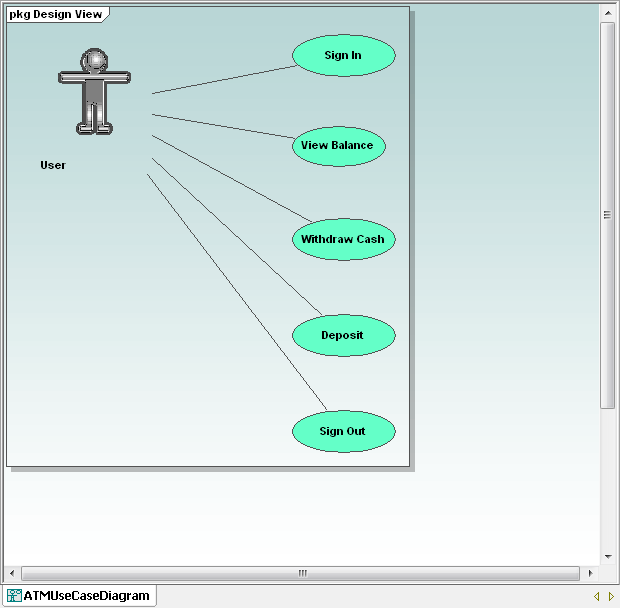 If you are familiar with UML notation, the first thing you may have noticed is the actor in our diagram doesn’t look like the typical UML stick figure. UModel lets software modelers assign any Windows .bmp image file to represent an actor in a use case diagram. We used the Properties helper window to assign an image from the library provided with UModel.
  A use case diagram is not the appropriate place to define application flow or object-oriented classes, but simply to document how a user (an actor in UML terminology) interacts with the system. We can create additional use case diagrams to show more detail about each interaction. Expanding each interaction in a separate diagram improves clarity by keeping each layout simple and uncluttered and leaves plenty of space to try out different options.
  We added authentication of the account number and PIN in a note instead of a use case oval because the ATM user is not the actor who performs that step. From real-life ATM experience we can guess (because we haven’t looked at the code yet) that a withdrawal will be cancelled if the amount requested is larger than the account balance. But comparing the withdrawal amount and account balance is not done by the user, so that activity is also not drawn in a use case oval.
  The arrow inside the Withdraw Cash use case indicates a hyperlink. UModel lets you can attach one or more hyperlinks to any element in your diagrams. A hyperlink can reference a URL, an external file, or another diagram. The hyperlink dialog even lets you define helper text for your hyperlinks.
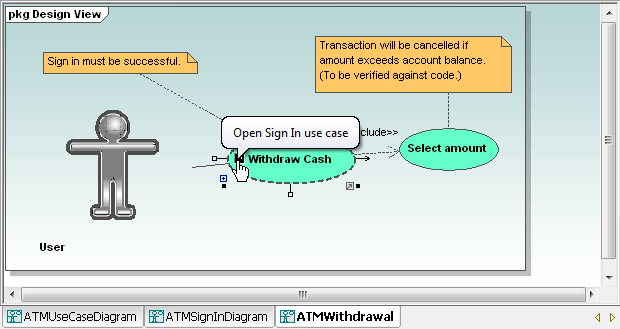 If you define more than one hyperlink, your helper text becomes a pop-up selection menu. Let’s say we’ve been assigned to modify the existing ATM Simulation to charge a fee for each withdrawal. If the withdrawal amount is less than $100, the fee will be $2. If the withdrawal amount is $100 or higher, the fee will be $4. Since the ATM is not stocked with one dollar bills, the fee must be charged against the account, not deducted from the cash withdrawal. The fee will be disclosed before any cash is dispensed and the user will be allowed to cancel the transaction. We can add the new requirement to our ATMWithdrawal use case diagram.
 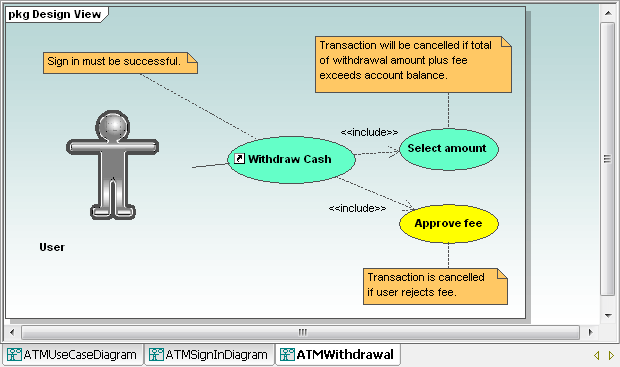 We changed the color of the Approve fee use case oval to indicate this is a planned feature that is not yet implemented. Some developers would argue that the note attached to the Approve fee oval is redundant, since the include notation alone signifies that Approve fee is a required component of Withdraw Cash. But lots of people are confused about the difference between include and extend and it’s best to be absolutely clear. We can also take advantage of the UModel Layers feature to place all elements related to the new feature on a separate layer.
 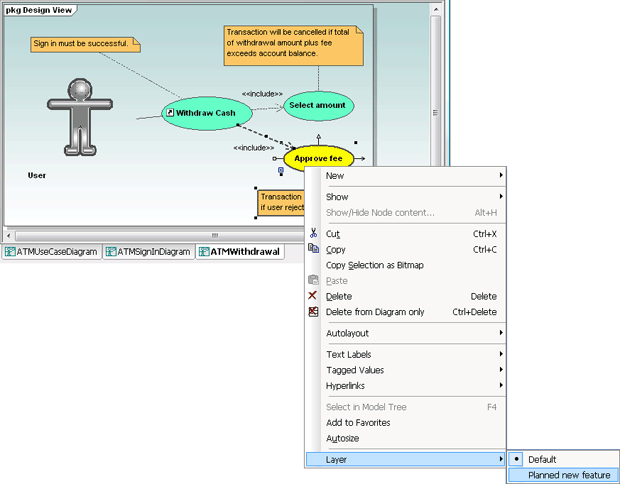 Now the Layers helper window allows us to show or hide the planned feature in our diagram view.
  Real world ATM experience tells us a transaction is missing from the legacy ATM simulation. The transaction menu does not offer an option to transfer funds between accounts. From the diagrams we’ve already created, we can see the original application design will make a transfer operation difficult to implement. The user sign in is based on the account number, and it appears that the legacy application does not understand the concept of a single bank customer who has both a checking account and a savings account. If our manager requests the transfer funds feature, we’ll need to have a conversation with our company’s enterprise software architect. A user ID linked to multiple accounts will need to be implemented not only in our ATM Simulation app, but also in the bank database. The Jolt award-winning Altova MissionKit for Enterprise Architects is a collection of eight XML, database, and UML tools for the enterprise software architect who may require UML modeling and database management tools in addition to advanced XML, Web services, and data integration capabilities. Click here to download a fully-functional 30-day trial. In the next installment we’ll look at the legacy ATM simulation from a completely different perspective as we prepare to dive into the code. See ya later!