Client Certificates on macOS
If your mappings include Web service authentication through HTTPS client certificates, follow these steps to deploy such mappings to a macOS running MapForce Server:
1.Open in MapForce the mapping which calls the Web service.
2.Double-click the header of the Web Service component. The Component Settings dialog box appears.
3.Click Edit next to HTTP Security Settings.
4.In the HTTP Security Settings dialog box, click Client Certificate, and then select the required certificate.
5.If the certificate name does not match exactly the host name of the server, select Allow name mismatch between certificate and request.
6.Save and deploy the mapping to the target operating system .
7.Transfer the client certificate required by the Web service call to the target operating system. Make sure that the certificate has a private key, and that the Enhanced Key Usage property of the certificate includes "Client authentication" as purpose.
To transfer the client certificate to macOS:
1.Export the client certificate with private key from Windows, in the Personal Information Exchange - PKCS #12 (.pfx) file format (see Exporting Certificates from Windows) and copy the .pfx file to the macOS.
2.If this hasn't been done already, make sure that the operating system trusts the server certificate (see Trusting Server Certificates on Mac OS).
3.Run Keychain Access from Finder > Applications > Utilities.
4.On the File menu, click Import Items.
5.Browse for the client certificate exported from Windows in step 1 and select a destination keychain.
6.Click Open and enter the password with which the certificate was encrypted.
Executing the mapping
You are now ready to run the mapping using the MapForce Server run command. Note the following:
•If you execute the mapping remotely through SSH, first unlock the keychain with the security unlock-keychain command.
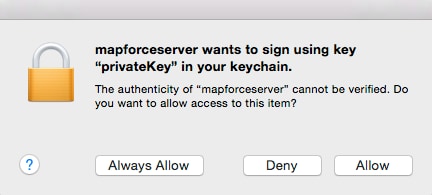
•If you execute the mapping through the macOS graphical user interface, when prompted to allow MapForce Server access to the keychain, click Allow.
