Create New Server Instance
After you have accessed the Setup page, you can proceed to create a new server instance or add an existing one. If the state on the Setup page shows that your server instance is outdated, you will need to upgrade the instance-data directory (see Upgrade Instance-Data Directory below).
Add a new instance
Assuming you are installing FlowForce Server for the first time, you might see the page similar to the one below:
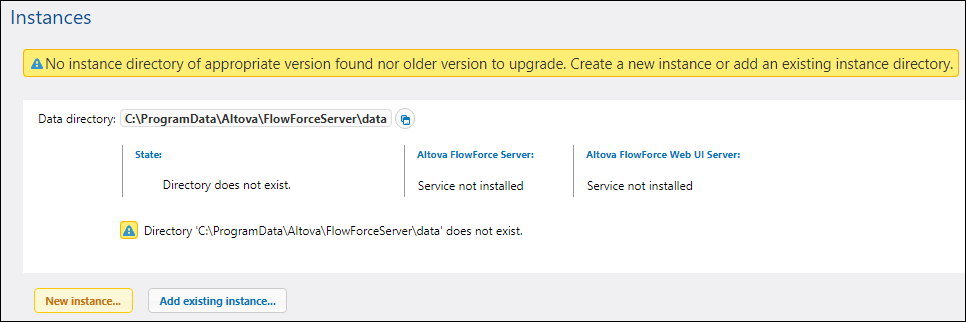
To create a new server instance, follow the instructions below:
1.Click New Instance (highlighted button in screenshot above).
2.Enter the folder where instance data will be stored. This can be any directory; note, however, that you must select your local drive for instance-data storage. Alternatively, you can opt for the default location of the instance-data directory.
3.Click Initialize New Instance.
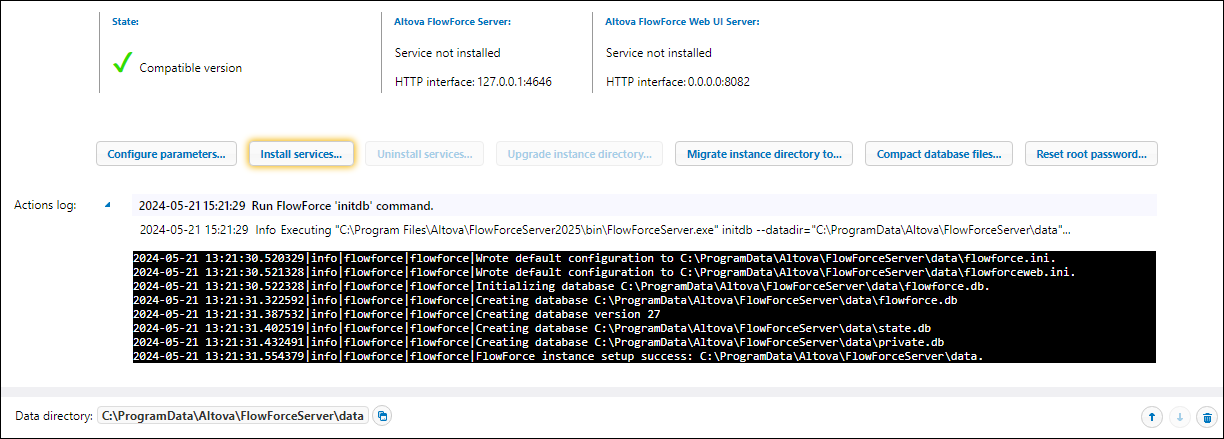
As soon as you have initialized the instance, the current state, logged activities, and various configuration options will appear (screenshot below). The state will inform you about whether the server version is compatible. You will also see information about whether the FlowForce Server and FlowForce Web Server services are installed and running.
Add an existing instance
If, for some reason, you have deleted a server instance from the Setup page and would like to add the instance back, take the steps below:
1.Click Add Existing Instance on the Setup page. This opens the Add Instance Data Directory dialog.
2.Select an existing instance-data directory that contains flowforce.db and other FlowForce instance files.
3.Click the Add Existing Instance button. The existing instance will be added to the list of instances on the Setup page.
Upgrade instance-data directory
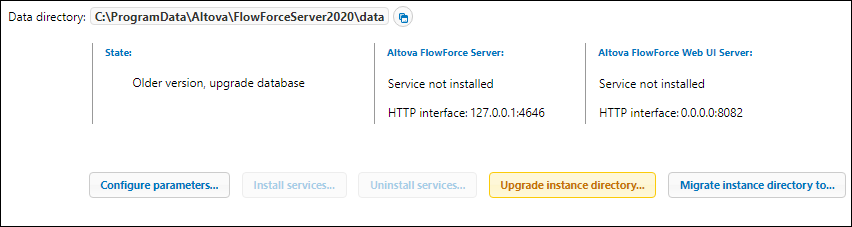
If the state on the Setup page indicates that your server instance is outdated, click the Upgrade Instance Directory button on the Setup page (screenshot below). This will upgrade the database to the latest version.
Next step
The next step is to configure various parameters, such as ports, SSL encryption, the default time zone. To configure these parameters, click the Configure Parameters button on the Setup page, which will open a separate page. For details, see Configure Instance Parameters.
Besides, if you have installed RaptorXML Server together with FlowForce Server (available on Windows) or separately (available on any platform) and wish to use the Altova RaptorXML Server functionality in FlowForce Server, you will need to integrate Altova RaptorXML Server into FlowForce Server. It is recommended to integrate RaptorXML Server before installing the FlowForce Server and FlowForce Web Server services. For details, see Integration with RaptorXML Server.