Updating Shopify Inventory from a Mobile App
One of the benefits of using Shopify as an ecommerce platform is that it provides robust inventory management features. However, maintaining accurate inventory records in real-time can be challenging, especially for merchants who rely on manual data entry during inventory audits or restocking.
Handheld barcode scanners are a great solution for increasing speed and accuracy during inventory checks, but storeowners often lack a seamless way to connect scanner data directly to the Shopify system. Without proper integration, staff may still need to manually transfer scanned data into Shopify, negating some of the efficiency gains that barcode scanners are meant to provide.
Let’s take a look at a real-world scenario for building a mobile app with barcode scanning functionality that integrates directly with Shopify for real-time inventory management.
Shopify tracks key inventory metrics, including the quantity on hand at each location, the number of items committed to existing orders, and the availability for new orders. Keeping these numbers accurate is important to prevent overselling or accumulating inactive, non-moving stock.
One effective way to maintain inventory accuracy is through regular inventory audits or cycle counts. A mobile app that allows you to quickly update the on-hand quantity for each product variant directly in your Shopify store can streamline this process, helping to increase speed and reduce the cost of manual inventory checks.
Using products in the Altova Data Platform, we can create a workflow for collecting barcode data with a handheld scanner and mapping it to Shopify in real time.
Shopify and GraphQL
Shopify has standardized on the GraphQL API for interacting with external data, whether that be to extract data for analysis or, in our case, import data for inventory management. For more information how Shopify GraphQL APIs work and how to connect to them, please see our previous article on exporting data from Shopify.
Requirements and design of a Shopify inventory app
Our workflow will utilize a number of Altova products working together:
- MobileTogether Designer – for building a barcode scanner app
- MobileTogether Server – for hosting the app for mobile devices
- MapForce – for mapping data from the app to Shopify
- MapForce Server – for executing the mapping on a server
- FlowForce Server – for workflow orchestration and making mappings available as web services
The design process starts in MobileTogether, Altova’s low-code app development framework for building data-centric apps. The framework includes comprehensive support for building apps that store and process data from handheld barcode scanners.
In Shopify there can be many Products, and each product might have one or many product Variants. Internally, each product variant has exactly one InventoryItem. An inventory item can have multiple InventoryLevels: one inventory level per each Location. And locations represent a geographical location where a merchant does business, such as a retail store or warehouse. You can find more on the relationship between these objects here.
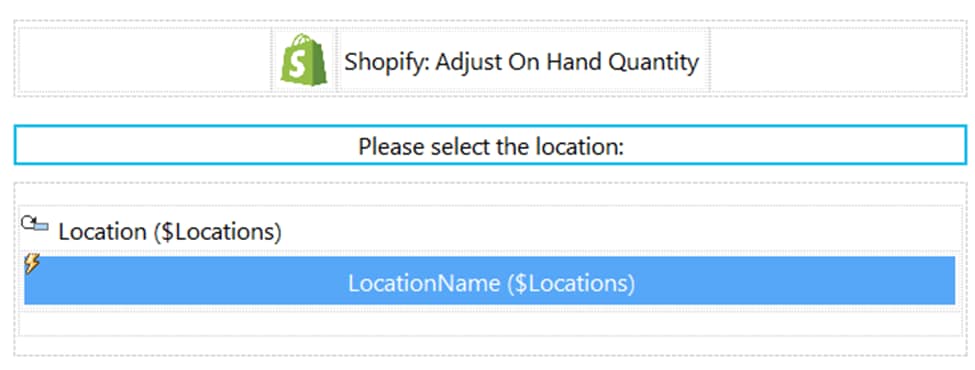
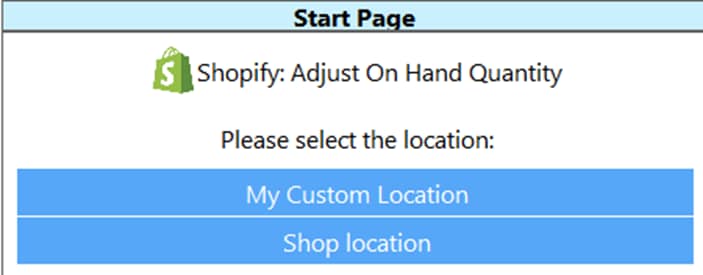
So, in order to update quantities of a product variant, we need to mutate (GraphQL parlance for update) inventory levels for a particular inventory item in a particular location. With that in mind, we can start our application workflow in MobileTogether Designer by first asking the user to choose the location we are counting inventory items in:
To fill the table of locations for a Shopify store, we will use a MapForce mapping to query all locations.
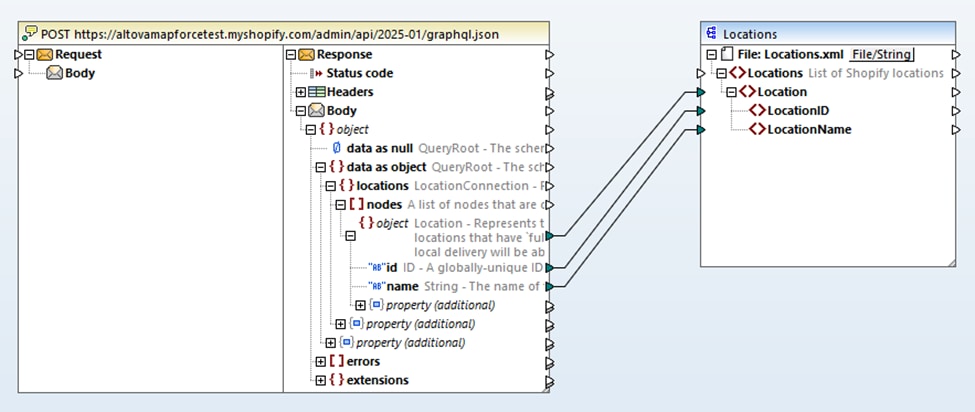
Here is the GraphQL query that we will use in Shopify/GraphQL web request component on the left:
{
    locations(first: 100) {
        nodes {
            id
            name
        }
    }
}
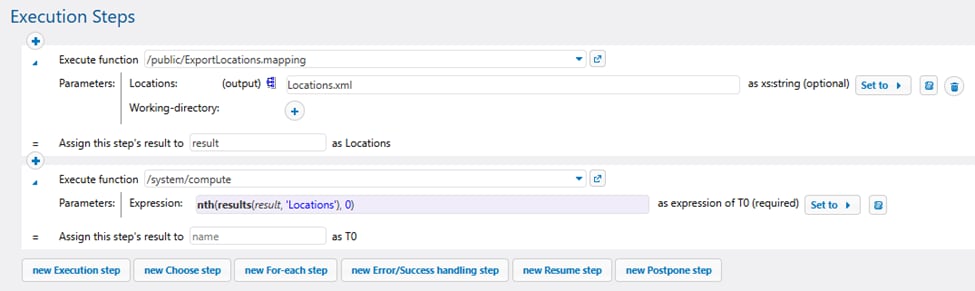
Next, we will deploy this mapping to MapForce Server and use FlowForce Server to make it available as a web service:
Don’t forget to expose this job as an web service via http(s):

Next, add a new FlowForce job as a new page source for the first application page in MobileTogether Designer:
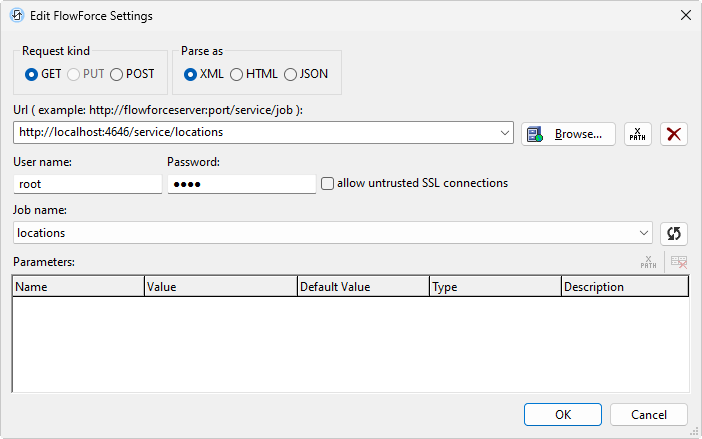
Please note, that URL should point to the FlowForce Server hostname, unless FlowForce Server and MobileTogether Server run on the same machine, in which case localhost will work. Also, while we are simply going to use http: for our example running on a local machine, you should definitely use https: in any production environment for security reasons.
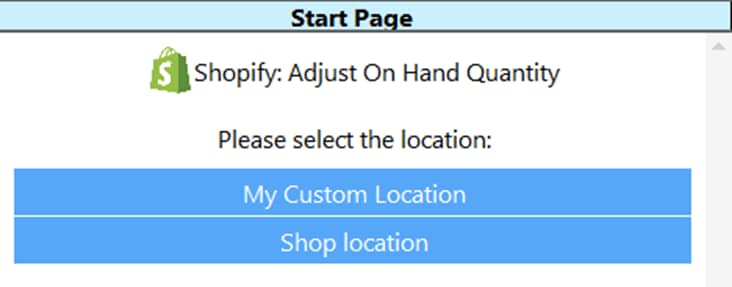
Now, if we test our app in the MobileTogether App Simulator we will see something like this:
After the location is set, we will configure the next page in the app to ask for a barcode and a quantity that we will pass to the following MapForce mapping. This updates the on-hand quantity of the item corresponding to the barcode.
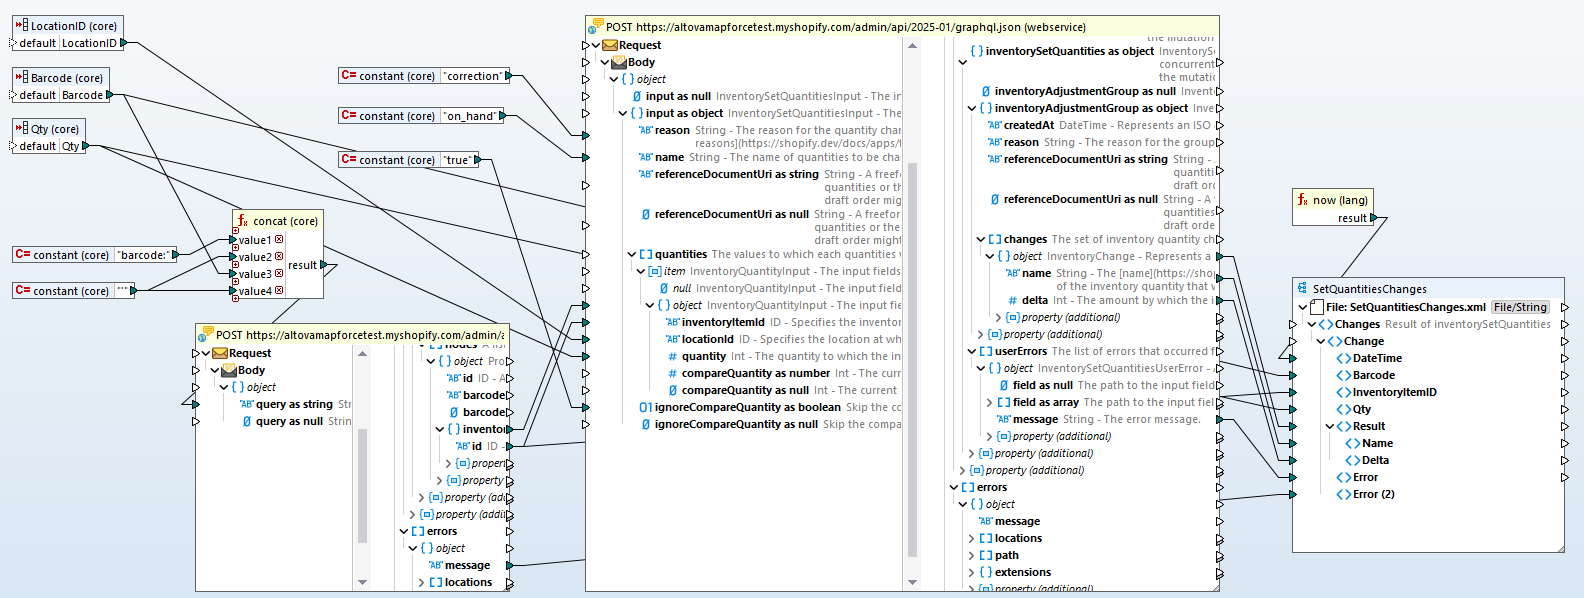
Here, the first Shopify web service call via GraphQL is used to look up the item ID for the given barcode:
query ($query: String = null) {
    productVariants(first: 1, query: $query) {
        nodes {
            id
            barcode
            inventoryItem {
                id
            }
        }
    }
}
And the second Shopify web service call then sends the mutation to update the on-hand quantity:
mutation InventorySet($input: InventorySetQuantitiesInput!) {
    inventorySetQuantities(input: $input) {
        inventoryAdjustmentGroup {
            createdAt
            reason
            referenceDocumentUri
            changes {
                name
                delta
            }
        }
        userErrors {
            field
            message
        }
    }
}
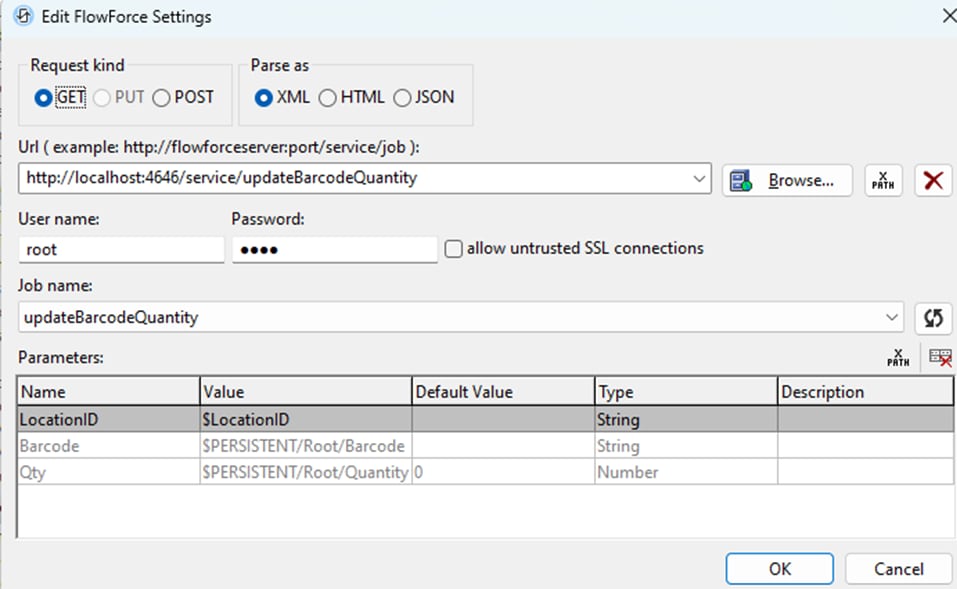
The deployed mapping can then be used in a second FlowForce job:
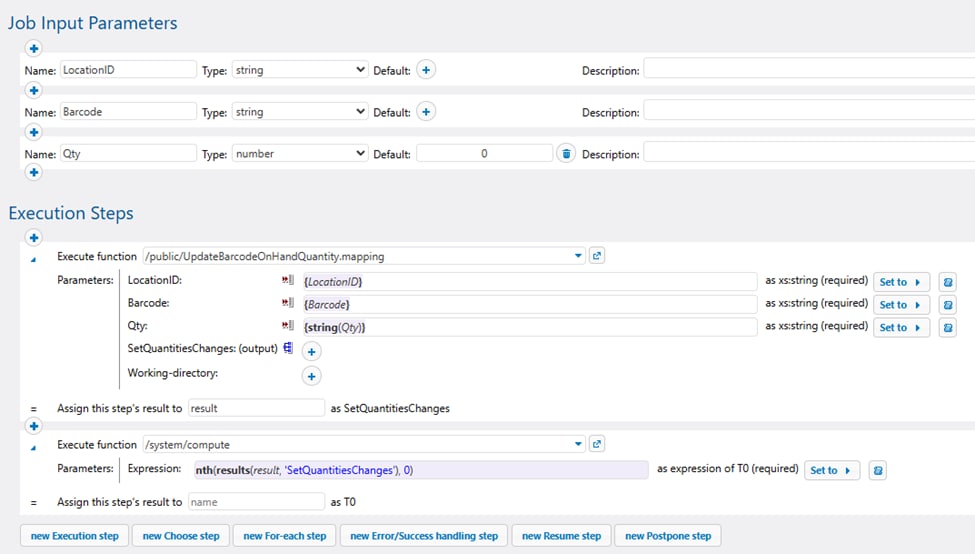
That we then expose as a web service via http, too:

Let’s use this mapping that is now deployed as an HTTP service on the second mobile application page in MobileTogether Designer:
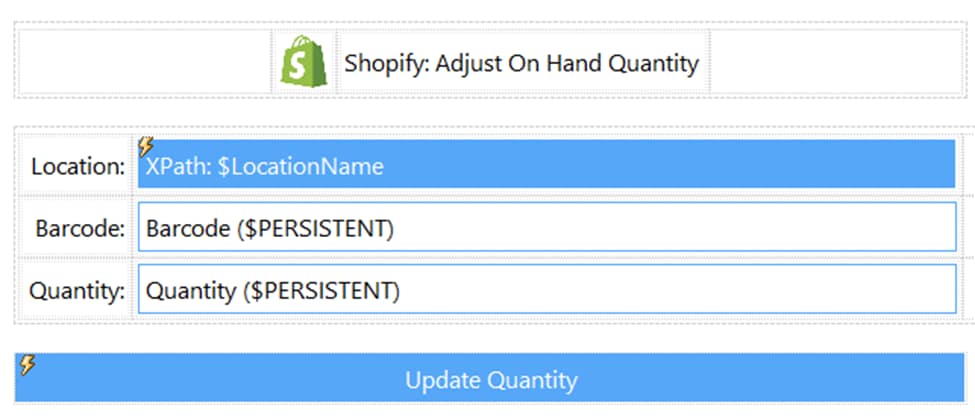
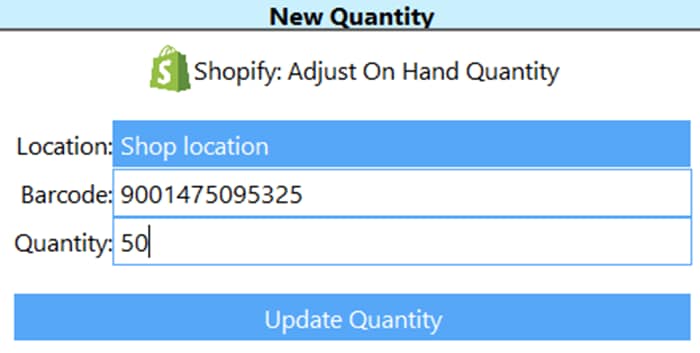
Here we show the previously chosen location and ask to input the barcode and quantity. The on-click event for the Update Quantity button will call FlowForce Server HTTP service:
Again, please note, that URL should point to the FlowForce Server hostname, unless FlowForce Server and MobileTogether Server run on the same machine.
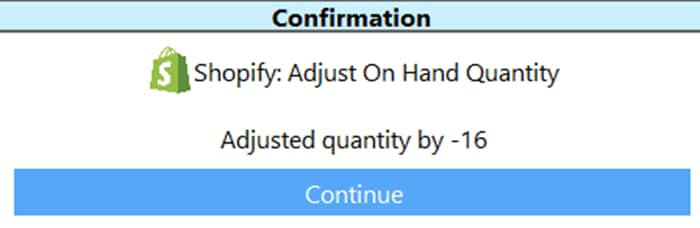
The result of the mutation we will show on the third mobile application page…
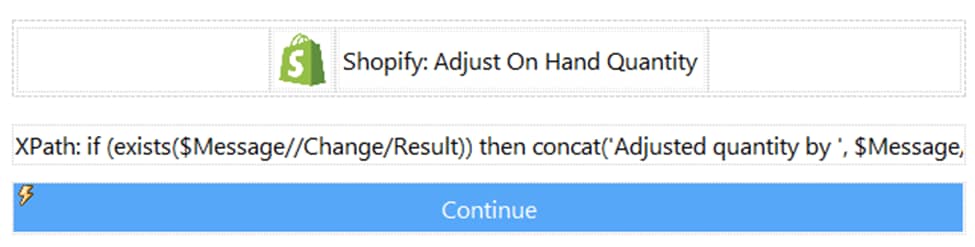
…where the Continue button would bring us back to the second page to enter a new barcode and quantity for the next inventory item check.
The full workflow might look like the following.
Choose location:
Enter barcode and quantity (via scanner):
Update and get confirmation:
What’s next?
Now that our barcode scanning app is ready, it will be deployed to MobileTogether Server so it can be run on mobile devices. The app will work on mobile devices that have an embedded hardware barcode reader that can scan and enter barcodes with one button push. MobileTogether also supports external wireless barcode readers (like Zebra or Datalogic) that can be integrated in the mobile app workflow.
The MapForce mapping to Shopify is available in the MapForce Examples project that ships with the software (Shopify_UpdateInventory.mfd), and you can enter your own Shopify store name and access token to try it.
All Altova products used in this example are available for a free trial, and MobileTogether Designer is a free product.